With Valentine’s Day right around the corner, your guys might be looking for the perfect item to give their ladies. Why not make a custom OOAK charm bracelet for your girls? Most pre-made, store bought doll charm bracelets are a fortune or come with fancy sets, but they can be made with a little patience and some items you might even have laying around your house.
the bits & pieces
Below we have the basic parts that make up the charm bracelet (these are for the silver and the gold version). Nothing too out of the ordinary, mostly items I had in my jewelry supplies and you might too. This isn’t the easiest project and may take some prior jewelry experience, but it might be a good way to challenge yourself because the outcome sure is worth it.


Here’s what you will need:
- Needle nose pliers (2 pair is even better)
- Wire cutters
- Head & eye pins
- Small chain link
- Jump rings (around 4mm)
- Beads and tiny charms
Disclaimer: If you are underage, please ask for adult assistance or supervision when cutting wire.
Tip: Look for jewelry findings that may look like charms or check some of your own jewelry. Many necklaces have small charm style “tags” at the end of the chain where the necklace clasps together. If it’s not needed on your real necklace, why not use it for doll jewelry?
the how to
silver & gold charms


After collecting the desired beads and findings for your charm bracelet(s), let’s get started!
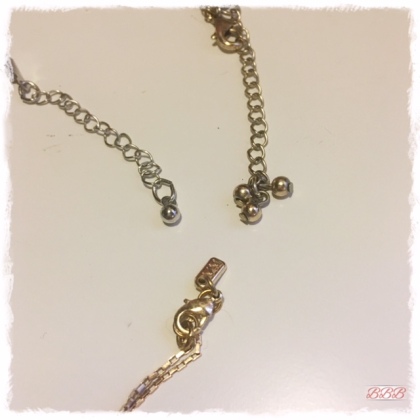
The first thing we do is prepare the charms (follow the pictures below from left to right and down). For the items that just need a jump ring or loop through the hole, open up the ring with your pliers (this is where 2 pair might be helpful). Loop one of the open ends through the bead or charm and set it aside for now.
If you are using a bead that needs a head pin to create the charm, you will want to prepare that now. Thread the head pin through the bead (you will want to make sure the head is large enough not to slip through the bead hole).
Next, you will need to trim the wire once you have determined how much you will need to create a loop or “eye.” I would say somewhere between 1/4″ and 3/8.” Once you have trimmed the wire, take your needle nose pliers and wrap the wire around the tip to create the loop.
Now that you have your charms ready, you will want to attach them to your chain links. You can attach the charms with a jump ring directly to a link. For the beads you added a head pin and loop to, they will likely need an additional jump ring added before placing on the chain. I generally place the charms on every other link with a maximum of 4 charms.
I start on one end. Tip: keep the chain you are working with longer than you will ultimately need it.
Add a jump ring to one end of your chain (this is helpful in handling the chain while adding the charms. It can be a little challenging to handle, so you might want to attach the end with the jump ring to your pant leg thigh area with a pin so that you can stretch out the chain while adding charms. Close up the jump rings as you add your charms.
Once you are happy with the placement of your charms, measure it against your doll’s wrist. You will want to keep in mind that you will be adding another jump ring and a “hook closure” once you trim the chain.
After you have determined and trimmed the length of the chain, you will want to add a jump ring and eye pin.
The last step is to trim and create the hook on the eye pin so that you will be able to clasp the bracelet together. Trim the straight part of the eye pin down to about 1/4″ and create the hook with your needle nose pliers. This might take a few tries to get the length just right. I hope these instructions are detailed enough (fingers crossed)!


To attach these to your doll’s wrist, you will probably want to use your pliers to attach the hook to the jump ring.
nautical charms
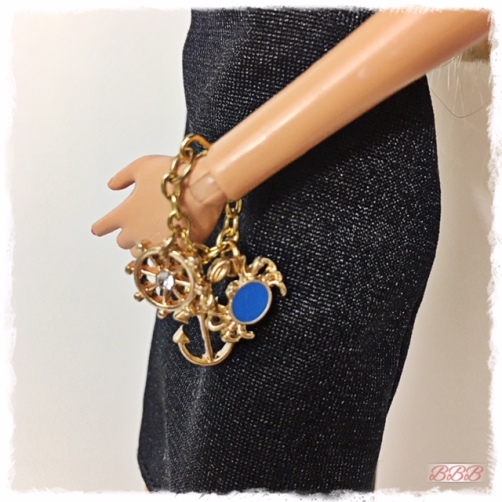
For this style, we used earrings from our Claire’s haul and trimmed off the post and filed down the stub so that it wouldn’t scratch our dolls. I chose earring styles that we could loop a jump ring through and link it to the chain.


onyx & pearl charms
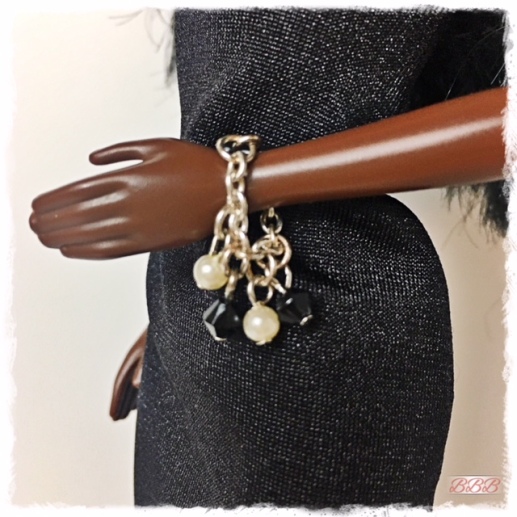
Follow the same steps in the first charm bracelet instructions and use what beads you have or find. You can really use any combination you like!

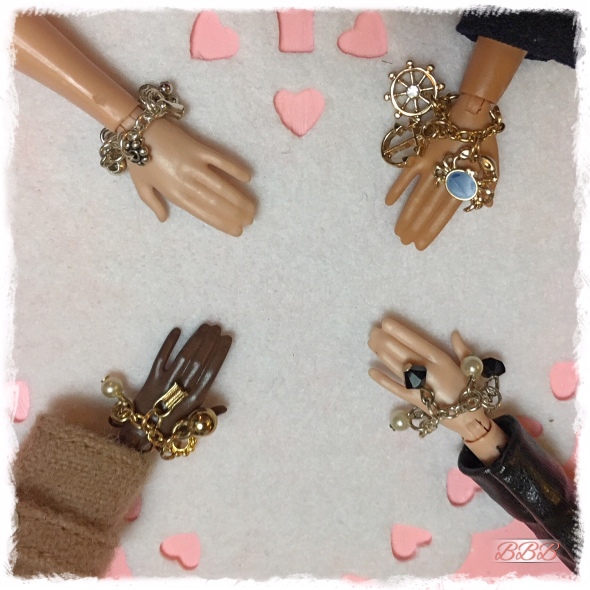
Now all of the girls are decked out in charm bracelets that suit their style!
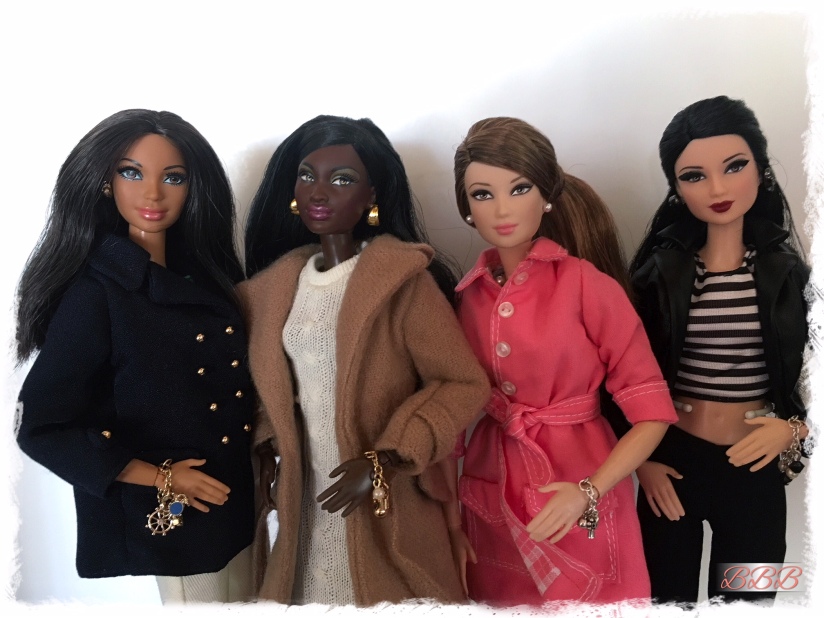
Modeling the bracelets from left to right: Simone, Rochelle, Bruni, and Rooney
Thank you for stopping by for some jewelry making inspiration. I hope you found it helpful and learned a few tricks! Don’t forget to follow our blog if you would like to receive email notifications when we post. Hope to see you again next week! XO
A la prochaine
Rie & Bruni


Very nice!
LikeLiked by 1 person