
Since Bruni is so obviously a classic cardigan girl, not to mention a sweater set girl, lol, I had to figure out how to make a cute, affordable cardigan. There are a lot of sock doll fashion ideas out there and that is because it’s a fantastic way to get knitwear into your dolls wardrobe without spending a fortune or knitting yourself silly! Read on to see how we created ours…
This project was done completely by hand stitching (no sewing machine), but I am curious to test it out on my machine. For the knitwear, I used kids socks from Dollar Tree that come in packs of three. This was my first try and I definitely want to make a few small adjustments to the collar next time, but plan to make a bunch more since I bought all the colors of socks they had at the store.
Click here for a printable PDF Cardigan Pattern . This pattern has been adjusted a bit for the collar.
the bits & pieces
Socks! You will be using both socks since we want to use the banded portion of the sock for the bottom of the cardigan.

the tool box
- Needle
- Thread
- Scissors
- pins
- ribbon or seam binding
- mini buttons or beads
the steps
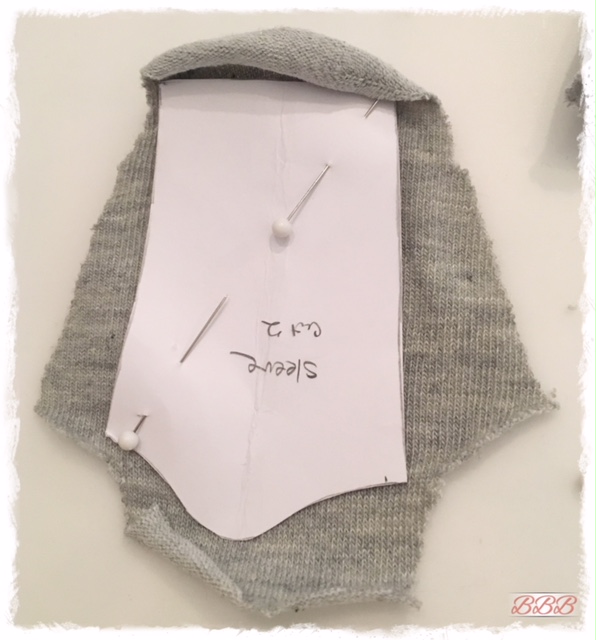
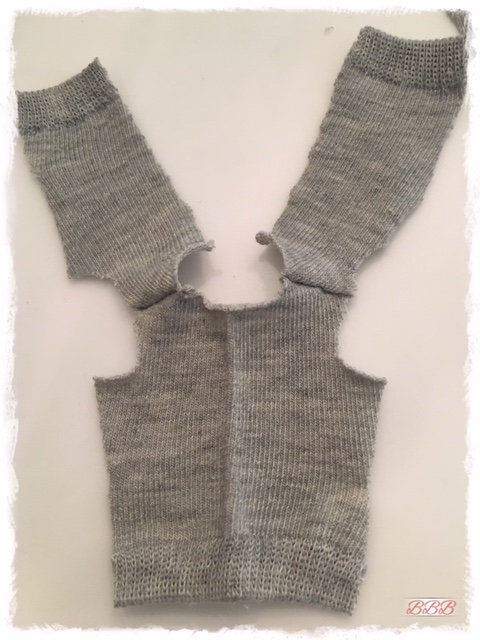
Lay out each of your socks the same way with the band of the sock as the bottom band of the pattern. Below I am showing the back piece already cut out and the front sections ready to be cut. The front section will need to be cut down the middle unless you want to take a stab at making a pull over sweater at this point (not a bad idea, but that can be for another day)!

I cut out the sock seam of the toe area so that it could be placed flat and ready for the sleeve pattern pieces.

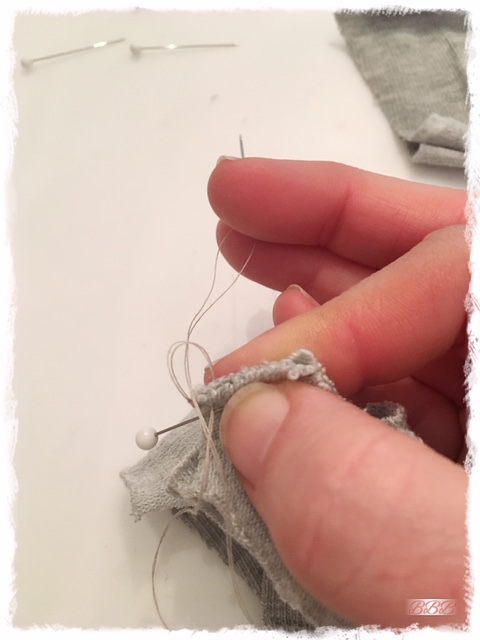
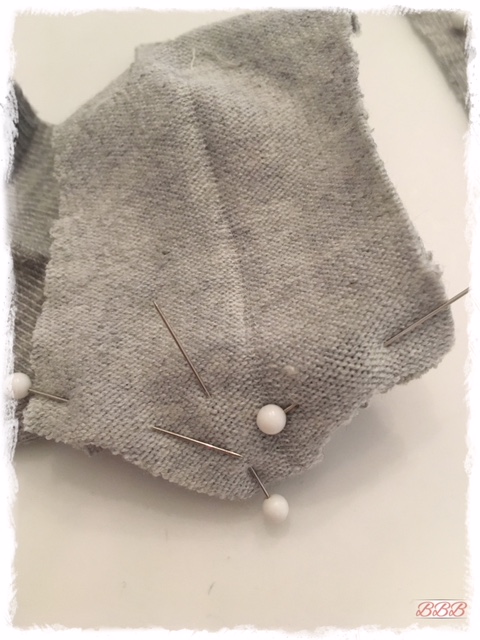
Once all of your pieces have been cut out, it’s time to start constructing the cardigan. Start by pinning the front and back pieces together at the shoulder seams (I didn’t have smaller pins with me at the time, so I used regular pins for this).

Use a blanket stitch to sew the pieces together. This type of stitch will help the edges to not fray (similar to a hand sewn serge stitch). I’ve shown a sample below from Google.
Sample blanket stitch
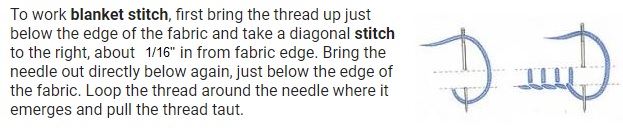
Source: Google
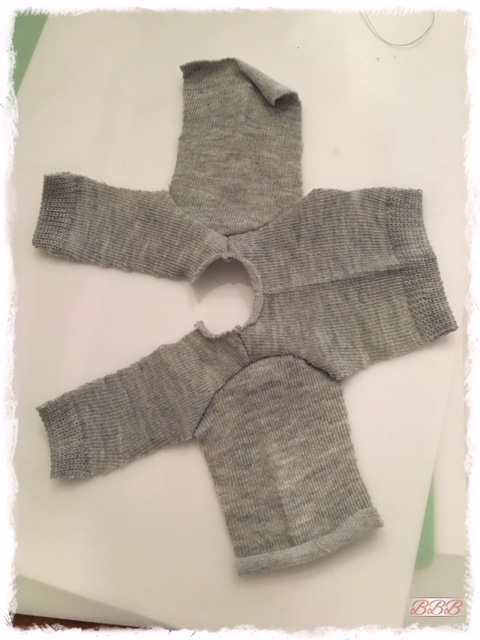
Once you’ve sewn the shoulder area together, double check to make sure the pieces are lined up.
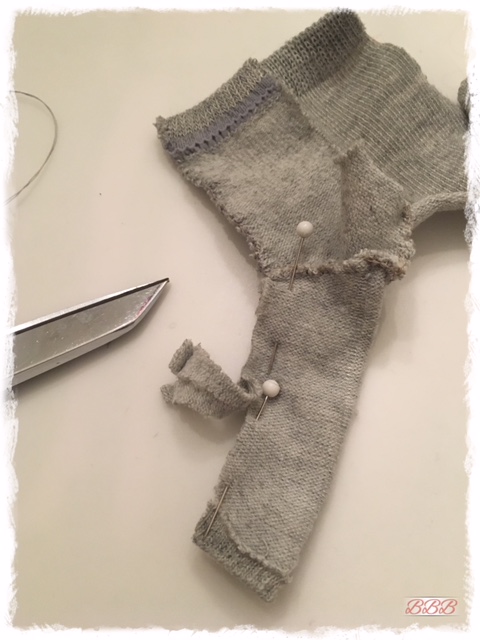
Next pin on the sleeves one at a time. Stretch the arm hole area to make sure the sleeve and shoulder piece match up. You want the edges to match up on both ends.
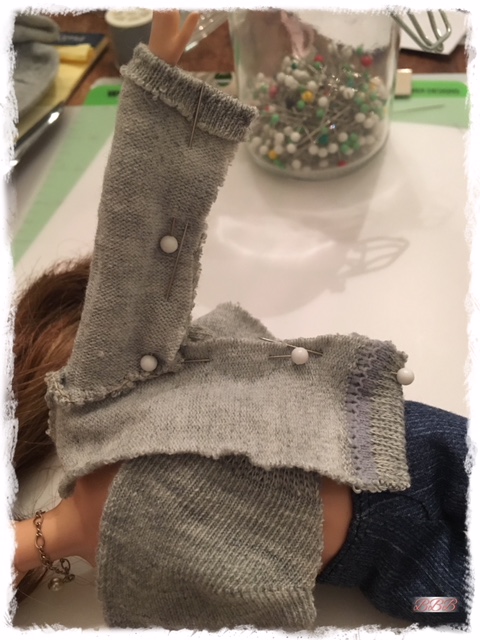
Again, check to make sure things are even after you have finished stitching the sleeves to the body of the sweater.

Now is the time to hand stitch a small hem on the sleeves. Check the length against your dolls arms. Once that is complete, you can check the fit and width of your sleeves and body. Adjust the pins to the desired width using your doll as a fit model.
Trim off the excess fabric before sewing your next seam with a blanket stitch since you want to keep the seam allowances to about 1/8.”
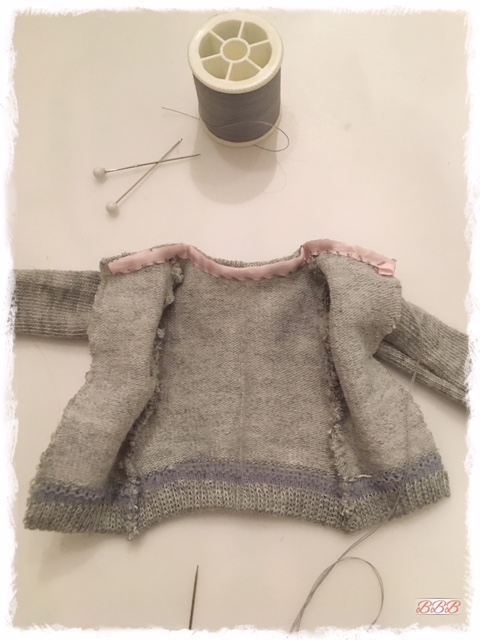
Continue onto the next sleeve and side. This is what the inside of your sweater should start to look like.

Next we tackle the neckline. This is where I was not 100% satisfied as I would have liked it to be a little smaller, but lesson learned. I’ve since adjusted the pattern. I used a small piece of ribbon to create a facing (seam binding or bias tape could also be used). Using something that is not stretchy will help the collar to not stretch out.
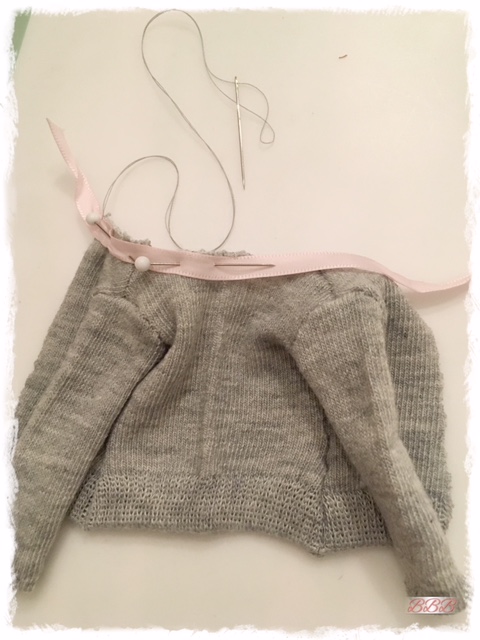
I continued to use a blanket stitch here too.
I then turned the ribbon to the inside of the sweater and used more of a blind stitch. Don’t be too worried about going all the way through the material, as long as your thread matches the knit, it is quite forgiving.
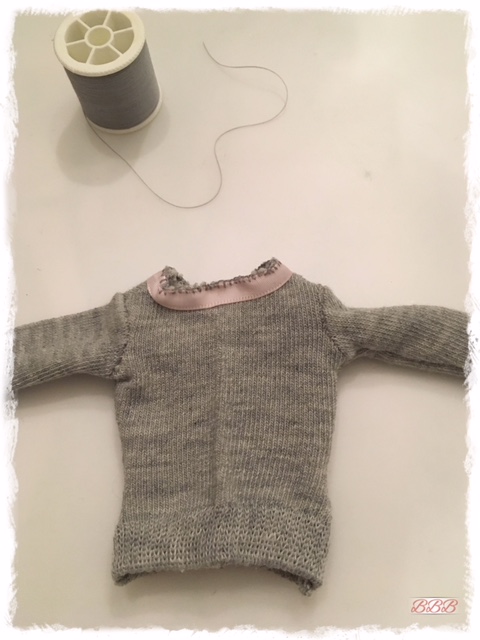
Once you’ve gotten this far, you can hem up the front raw edges and add buttons, beads, snaps, or eye hooks for final details. You could also add ribbon bows or other details to create a fancier sweater.
The tiny 4mm pearl buttons I used can be found on ISewforDoll’s Etsy store here. She has an absolutely amazing collection of micro buttons and notions! I can’t stay away! She ships from Tennessee and is very fast! Check out her Instagram also! @isewfordoll
Thank you as always for coming by to see what we are up to! We appreciate it so much and hope you got something out of it! Let us know if you tried out this project! I know we will be making many more! They are perfect for Spring!
A la prochaine
Rie & Bruni


Thank you very much!!!!!
LikeLiked by 1 person
Thank you for this versatile pattern and instructions. Can you create a button to download the instructions, as well. Love that I found your blog.!!!!!
LikeLiked by 1 person
You are quite welcome! I will check into that option…there might be something to print the post at the very bottom. Glad you found us too! 😊
LikeLike
I enjoyed this post! I plan to print the pattern and make a few colors. Thanks for sharing!
LikeLiked by 1 person
Great tutorial!
LikeLiked by 1 person
Thank you for this ingenious post! My little granddaughters will be tickled pink! So happy to have come across your site.
LikeLiked by 1 person
Thank you so much!!! Have fun!! 💗
LikeLike
Creative minds think alike 🙂 I cleaned out my fittness-bag out last week and found several patterned socks and made a sweater, long socks a hat and a dress for my Monstdoll and Blythedoll. I am currently making dollclothes from all my old but beloved clothes and its so much fun!
LikeLiked by 1 person
Awesome! I’ve been on a kick myself! Lots of new sock sweaters for the winter season!
LikeLike