

These chairs are so popular in human scale and so many design rooms, that I had to figure out how to make them using inexpensive materials. So, as promised here is a picture tutorial of how I constructed this chair. This post is quick and dirty and much rougher formatting than normal, but since it’s an extra post, I hope you don’t mind!
The real deal:

Source: Overstock
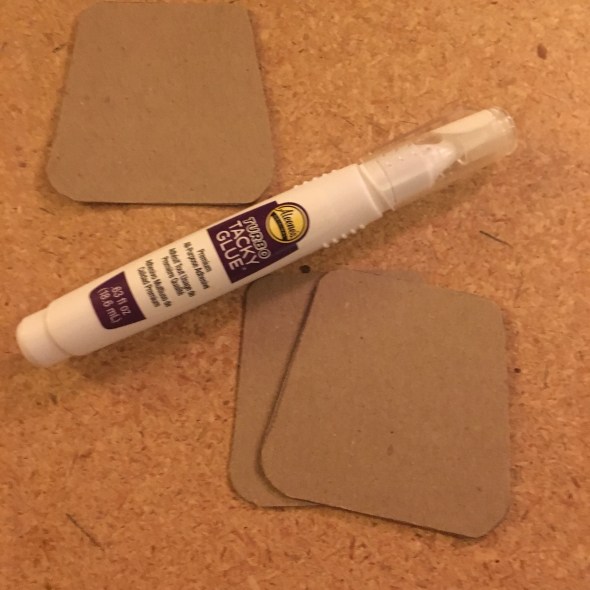
The bits & pieces

Here’s what you need:
- Medium weight cardboard (I collect this from form and stamp packages – thicker than cereal boxes). The backing of a legal pad of paper is perfect.
- Glue (Turbo Tacky glue and E6000 or a glue gun)
- regular Popsicle sticks
- 3/16″ dowels (1/4″ is fine if you don’t have the smaller size)
- Art wire (this is from Dollar Tree
- Chrome craft enamel (or equivalent acrylic paint)
- Black craft foam
Tools:
- Craft saw or saw & midor box
- Scissors
- Wire cutters
- Exacto knife
- Hole Punch
Disclaimer: If you are underage, please ask for adult supervision when using sharp objects or hot glue.
The How-To:
Print out the template pieces on your computer. Using the template, trace and cut out the pieces of cardboard. Find the printable template for the chair parts here.

First glue together two (2) of the seat pieces.
Spread the glue evenly and place under a weighted surface for evening drying.

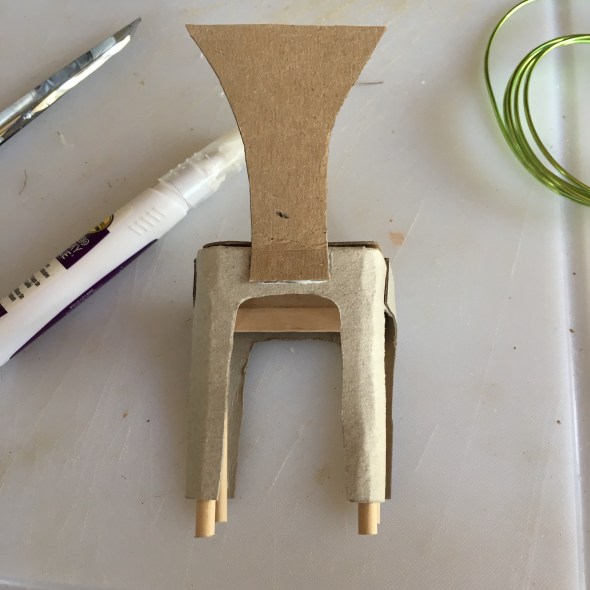
Cut the dowels to 3 inch lengths, you will need 4 total for each chair.

Glue each of the dowels onto the layered seat piece in each of the corners.


Next, take your Popsicle sticks and measure between each of the legs. These will act as braces and add strength to each chair base. Cut to desired length.

Glue the braces in place.


While the base is drying, you will want to prepare the leg facings. Determine where the cardboard will need to fold onto the seat and where it will cover the braces. Sketch a line along the straight edge.

Lightly score the cardboard cut outs along the line you drew.

Fold the cardboard inward along the scoring line.

Use your spare dowel to start shaping and adding a curve around the cardboard leg portion.

Where these parts will need to curve around the seat base, I cut a few slits for easier gluing.

I also wedged out a layer of the cardboard on the interior fold where we cut the slits.

Put glue on the dowel legs and around the seat base. Shape the piece and hold until the glue sets.

Once that has set, start adding glue around the base of the seat. I started with the corners, then the sides and last the back flap. I started with the back leg piece first.

This is what the back should look like. Trim the leg area to your liking.

Now it’s the next morning if you couldn’t tell by the lighting! Next, repeat the same process for the front section.

Add the slits to the corner area.

Glue the front and side area, again I started with the corners. In this case I folded down the front since the sides will need a little but more force to set the glue since it overlaps another layer of cardboard.

Once all of the glue has set/dried it should look like this.

Add a small scrap piece to level out the seat.

Again I trimmed the front legs until I was satisfied.

Next I glued the extra seat base we had to finish the top of the seat.

Next we start on the back of the chair. Determine where you will place the back and draw a line where the glue application will stop.

Lightly score the line and bend slightly.

Glue the back piece to the back of the chair base.
Next it’s time to add the back support and chair arms. I used the craft wire from the Dollar Tree. Larger gauge wire or copper tubing can be found, but I wanted to keep costs down.

Start shaping the wire with your fingers and figure out where it will glue onto the back and chair side area.

I ended up opting to use a hot glue gun for quicker setting, but E6000 can be used if you have time to let it set.

I put the glue on the back of the chair first and placed the wire there and let it set. After that I added glue to each side. Trim off any excess glue with scissors or an Exacto knife.

Next it’s time to start painting. I used the same hobby & craft enamel paint we used in many of our custom accessory DIY’s. I used Chrome.


Here’s the finished paint job. This paint has excellent coverage on the cardboard and wire, but go back and touch up where you see fit.

The last thing I did was add some rubber chair leg pads for a little more realistic detail. We used 2mm black craft foam for this.

I happen to have an edgeless hole punch that has different size hole inserts, but you can use a regular hole punch if that is all you have on hand (this might work better if you use the 1/4″ inch dowels).

Use tweezers or your nimble fingers to glue the tiny discs onto the bottom of the chair legs.

Now you are done!!
As always, thank you for stopping by! I hope you enjoyed this DIY and will try it out for yourself! Please be sure to Follow us by email to get notifications when we post . On your computer it should be over to the right >, on your smartphone or iPad, please scroll all the way down to the bottom and find that Follow button! Until next time…
A la Prochaine
Rie & Bruni


Awesome!! Thank you for another fabulous tutorial!!
LikeLiked by 1 person
You are welcome!! 👋
LikeLike
Quite an ambitious project! Thanks for the printable template 🙂 Inspiring!
LikeLiked by 1 person
Yw and Thank you! Just takes a little patience as most crafting does! 😊
LikeLiked by 1 person
I’m getting used to the slower progress of my Barbie crafting projects. Much different than my kitchen adventures 🙂
LikeLiked by 1 person