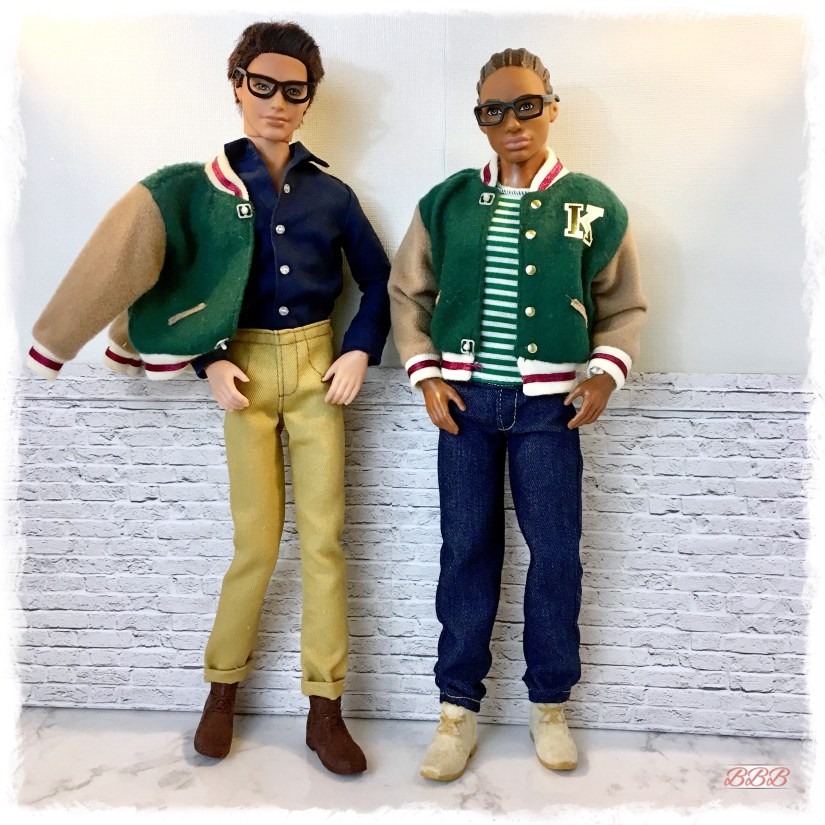
I know it’s been awhile, but as the saying goes, better late than never! I can’t even tell you how much I enjoy sharing with all of you and wish I could do more! I have so many ideas!
We are approaching Spring and it should be all butterflies, baskets, and weddings…but while embarking on my latest obsession of re-rooting and flocking hair, it dawned on me that flocking could be used for some fashion accessories, namely shoes (to mimic suede or velvet)!
I know how much you all enjoyed my other custom shoe and accessory DIY’s in the past, so here’s my latest! Enjoy!
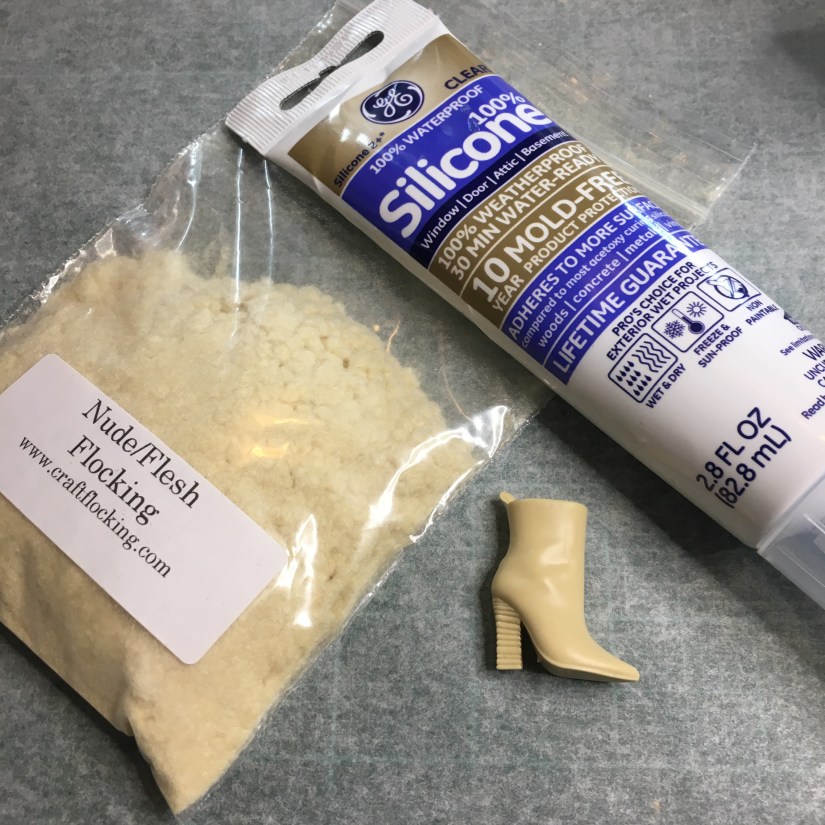
What you will need:
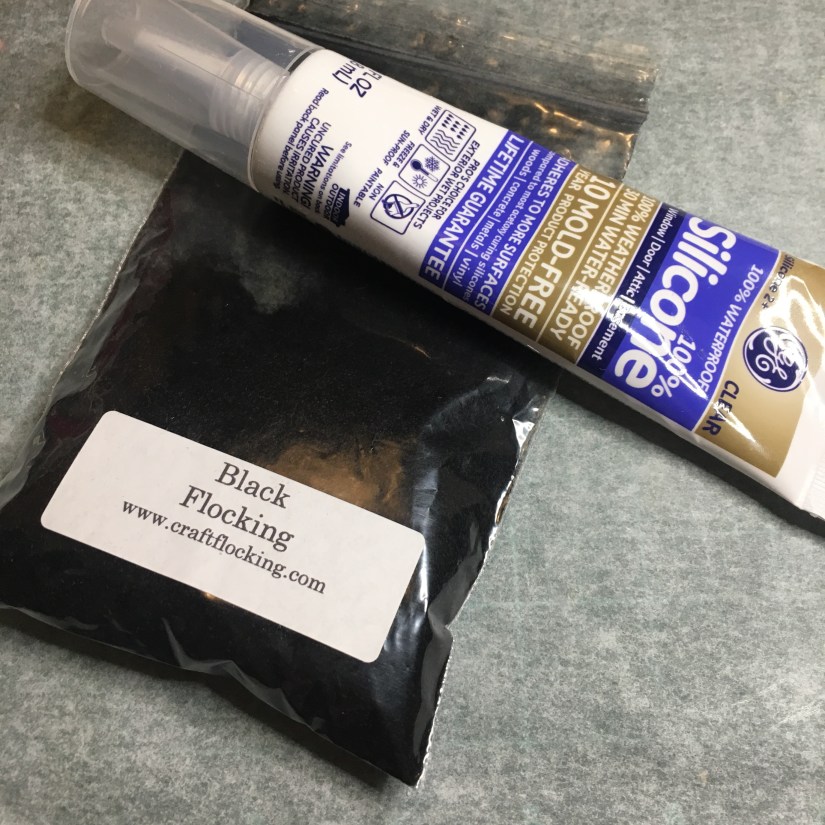
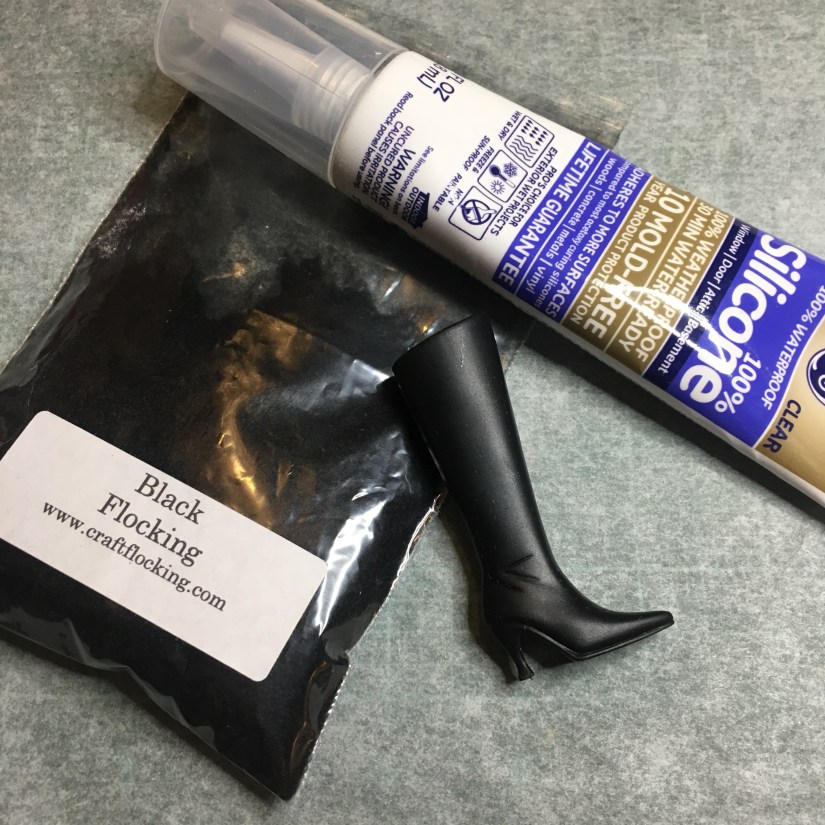
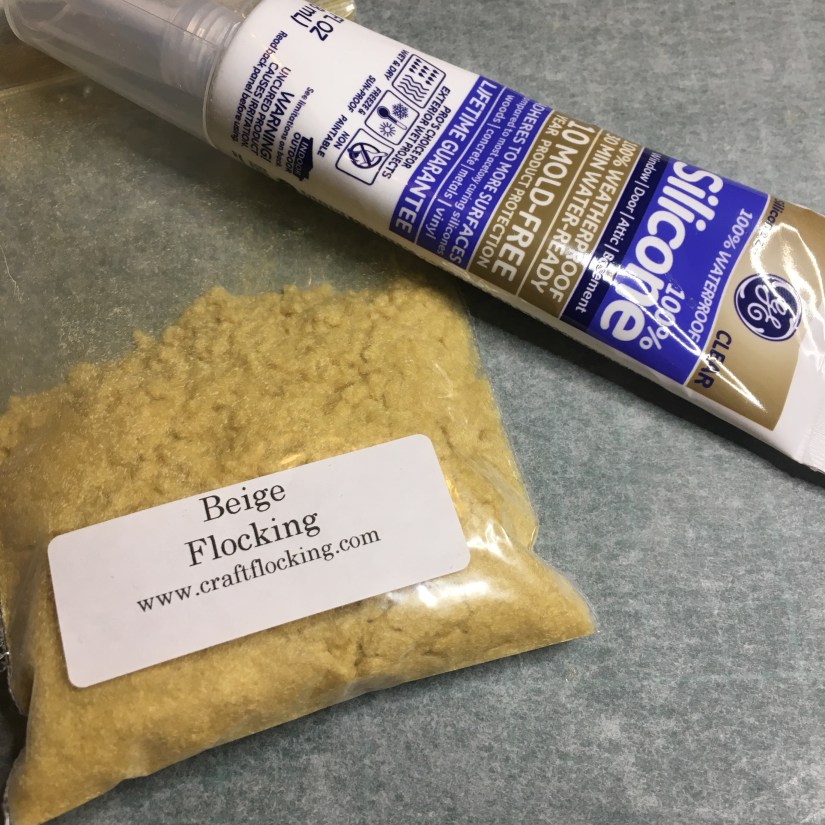
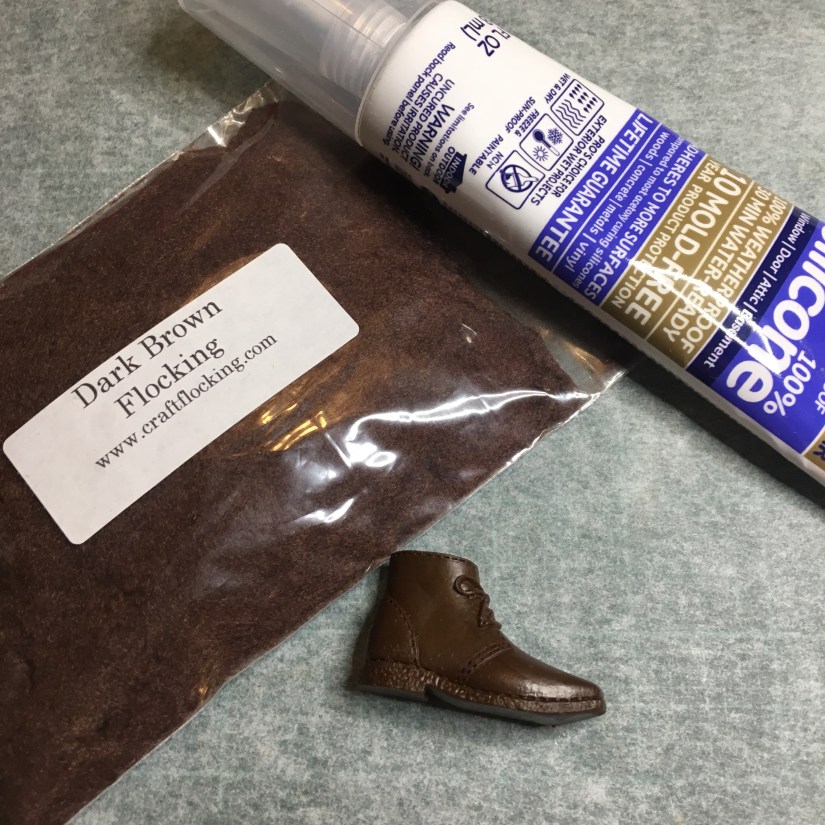
- Flocking powder (color of choice)
- Silicone glue
- Paint brush (that you don’t mind being “stuck together”)
- Small bowls for glue and flocking
- Small spoon
- Popsicle stick (for patting down flocking)
- Waxed paper to work on
- Trash receptacle
- Soft bristled paint brush (to get rid of excess powder)
- Nail embellishments, craft paint, E6000, etc.
I used a silicone home glue based on @superbuddiesforever hair flocking tutorials. This is not the same brand she used, but what I could find in Clear. That’s the key!
I ordered the flocking powder from an Etsy store called BearCountryHomeStore recommended by @thedauhlhouse. You can also see their direct website address in the pictures below. They ship very fast and have 50 colors. The colors I currently have on hand are all natural and neutral colors because I was using them for hair, but they do have brights and pastels as well.
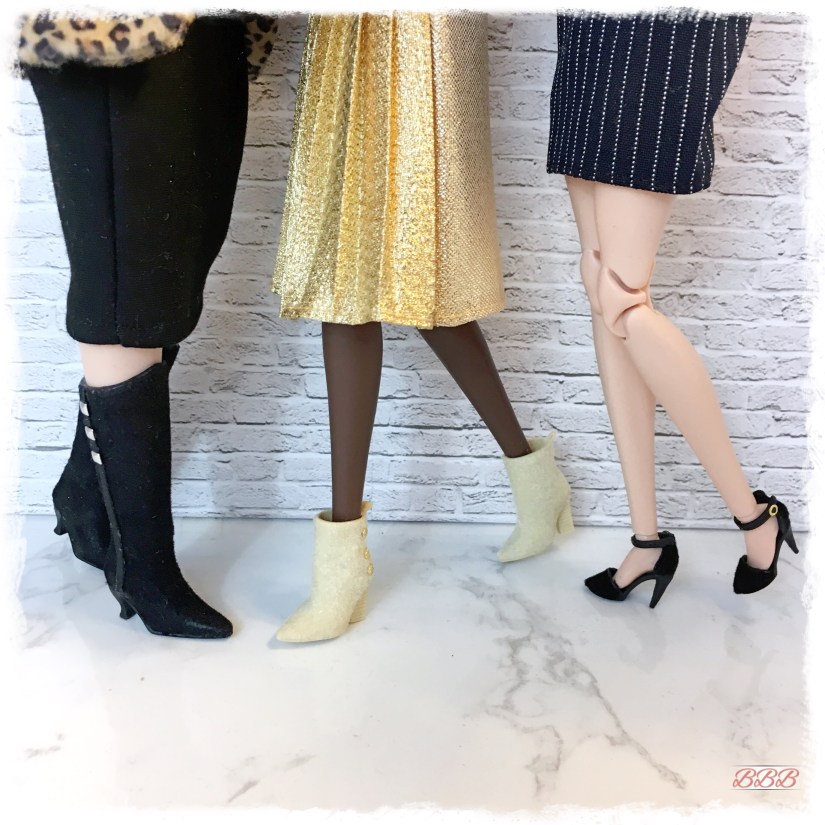
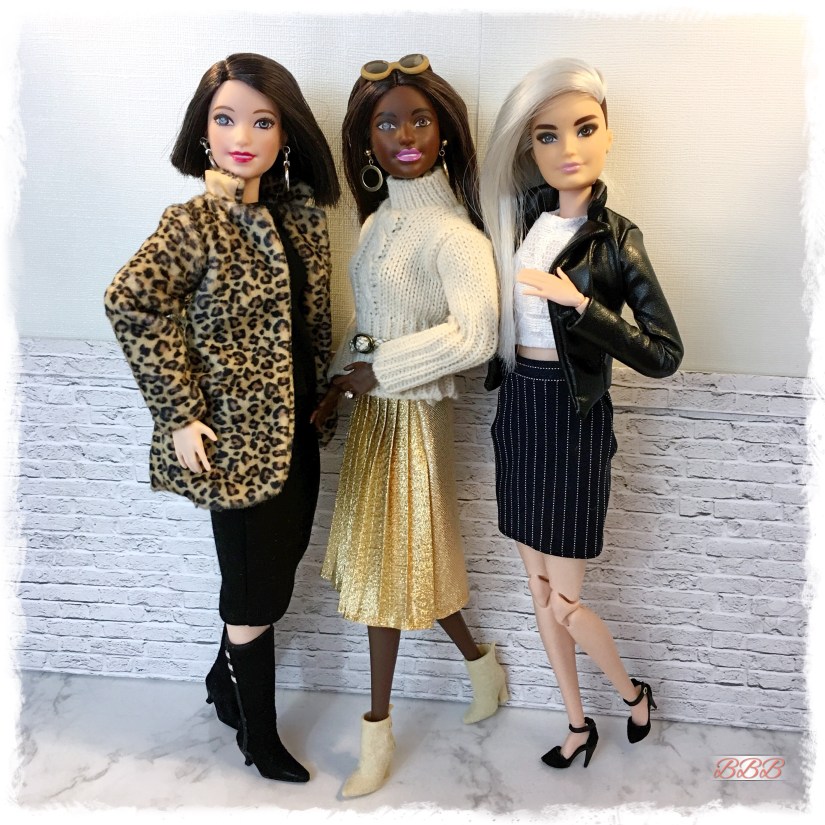
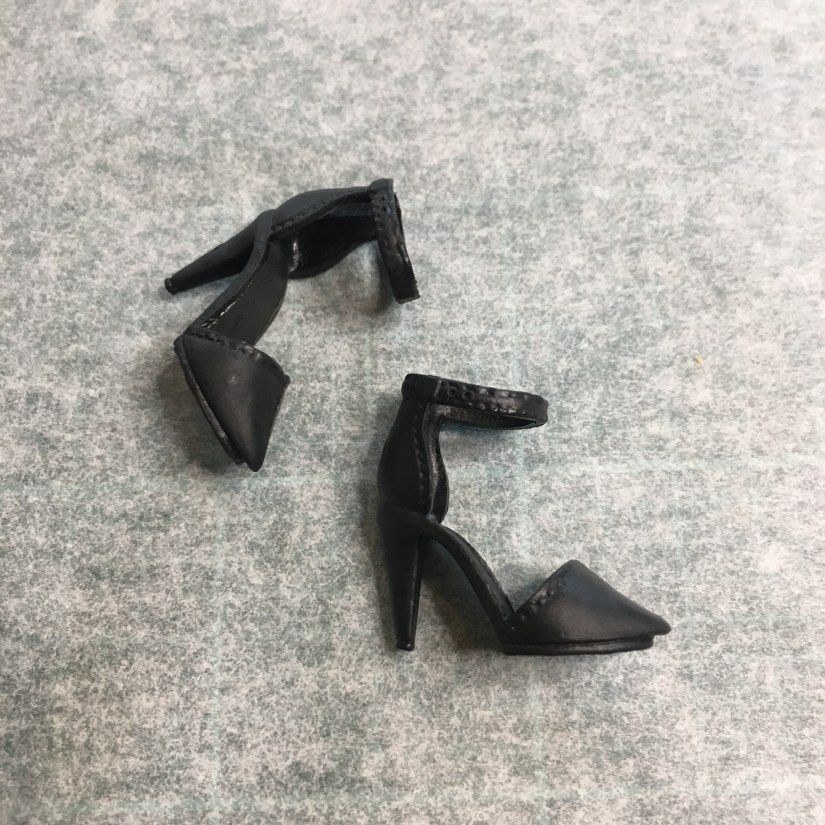
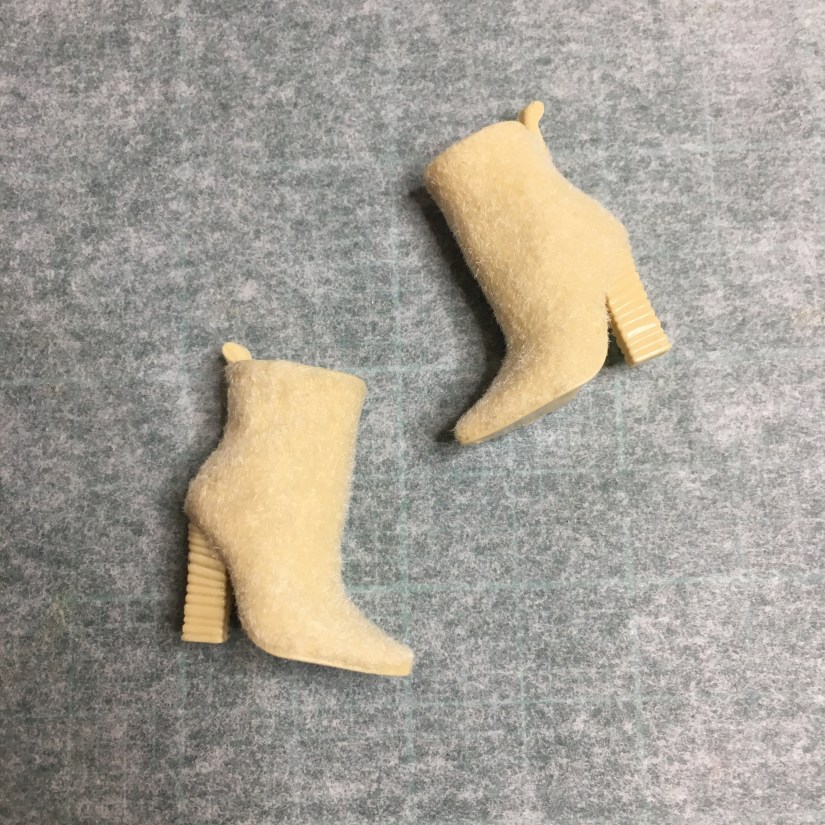
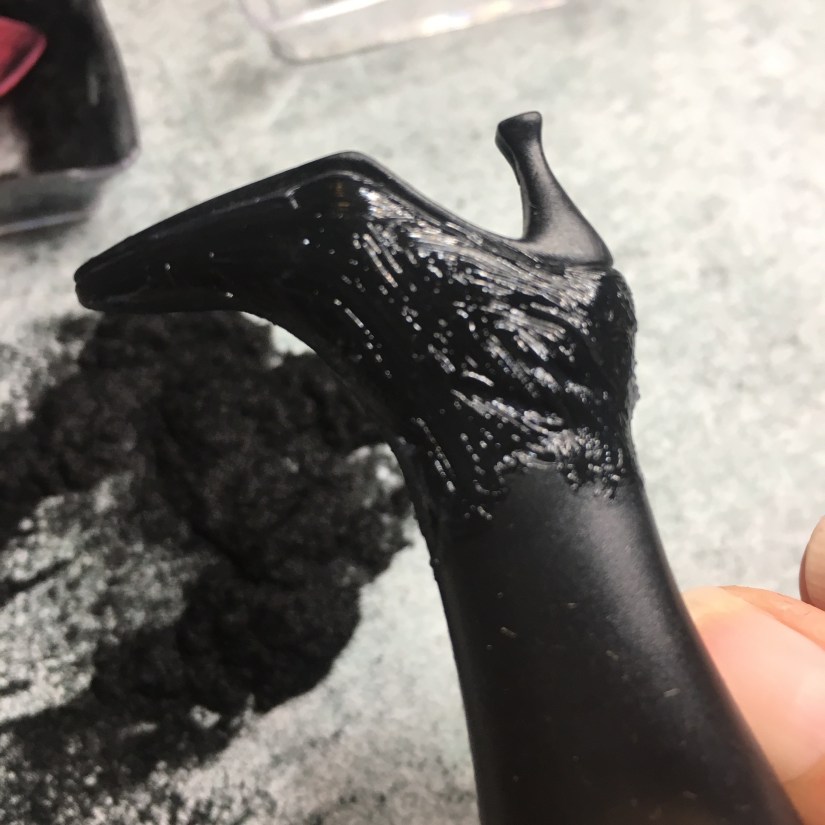
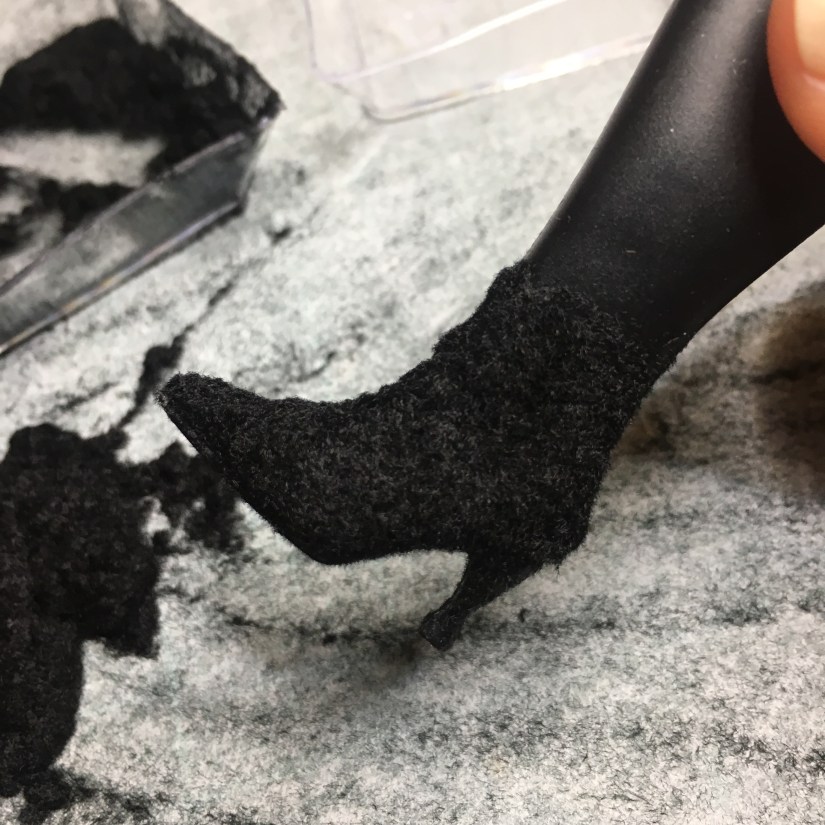
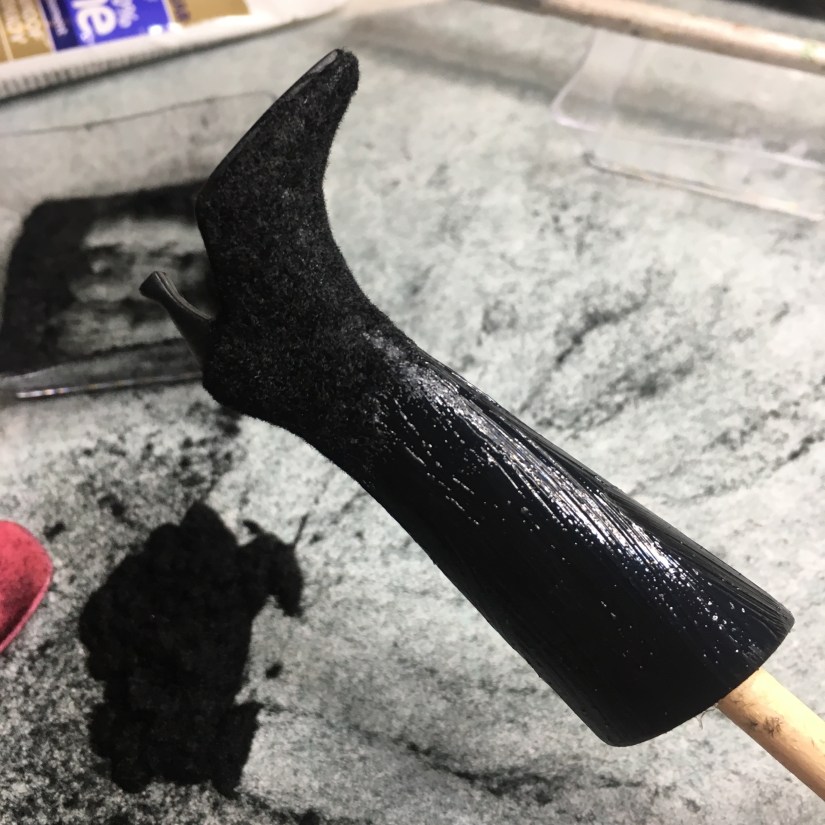
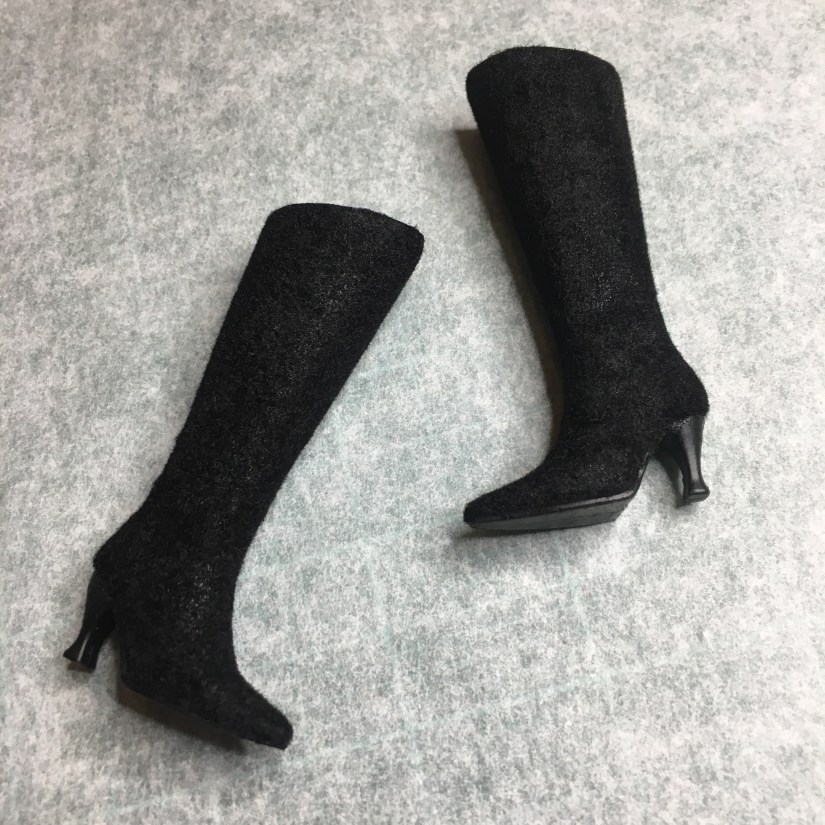
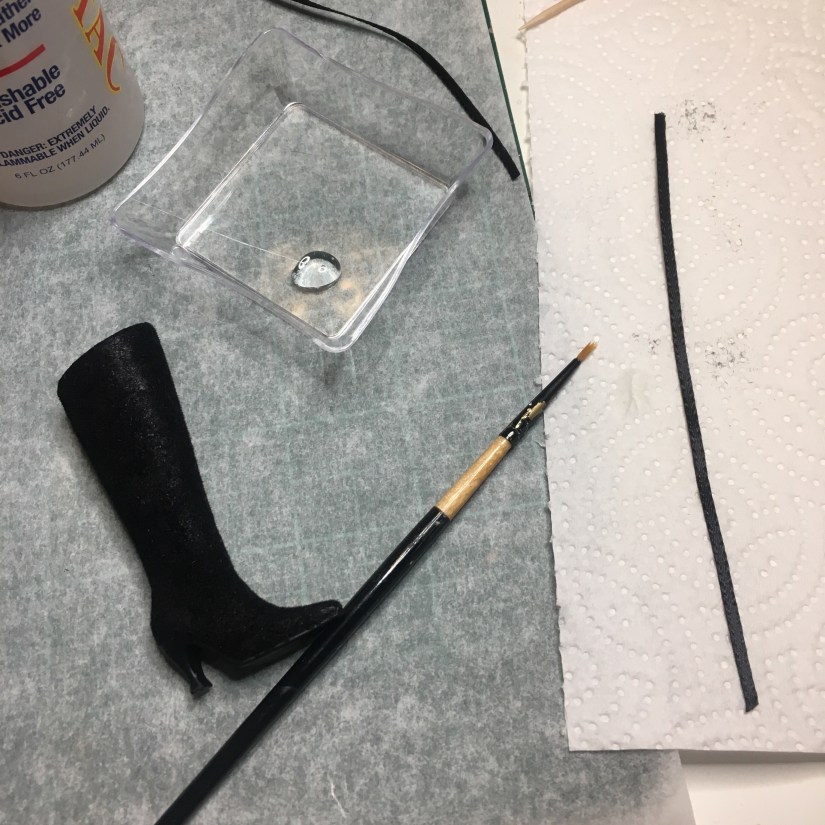
Velvety Heels
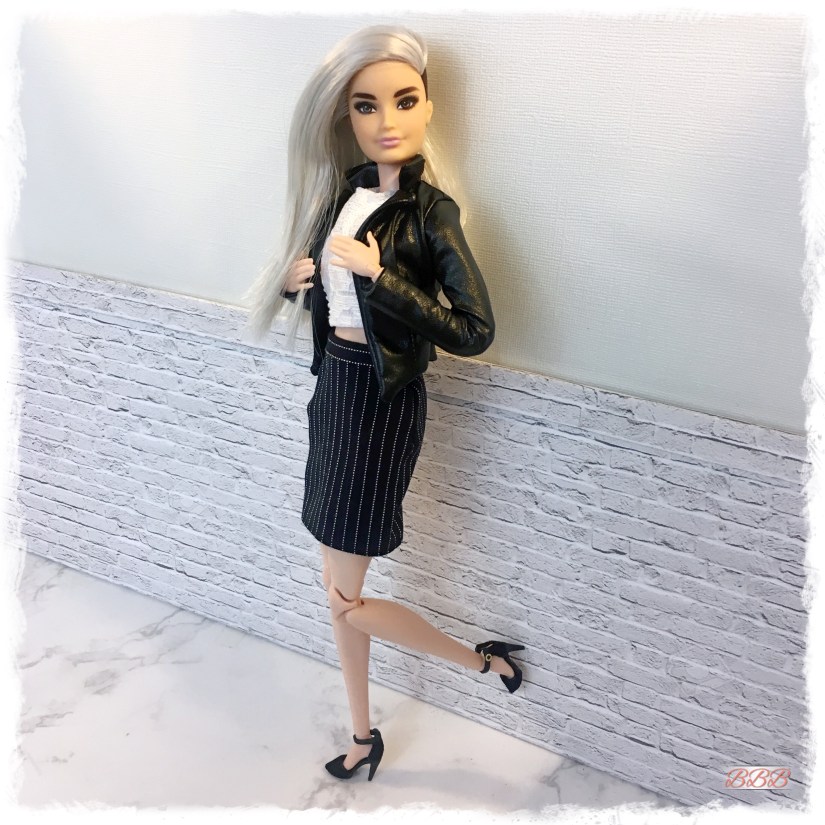
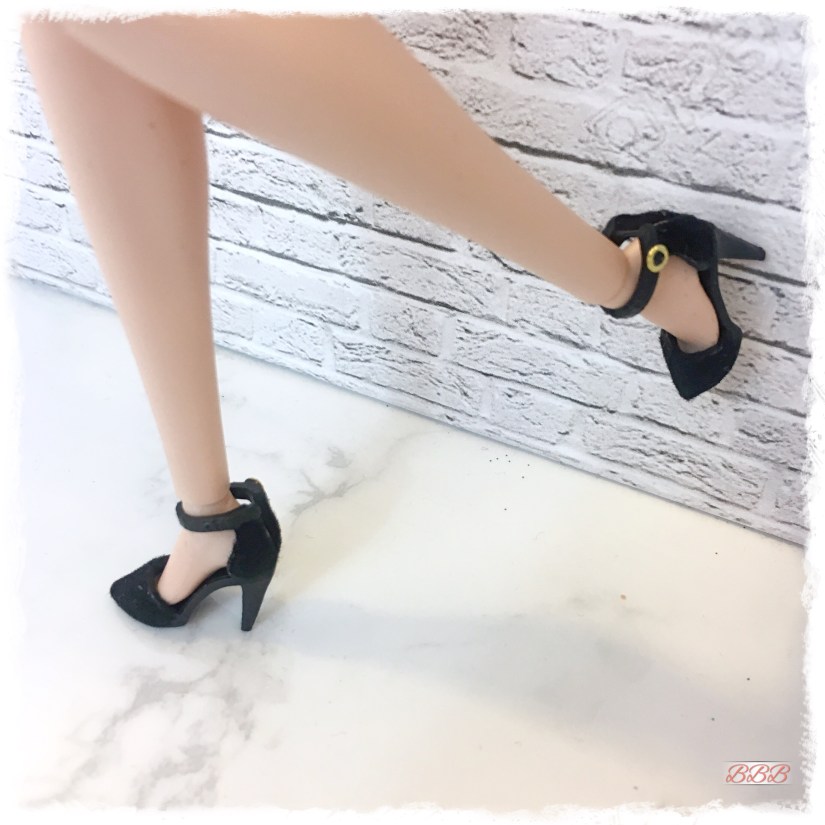
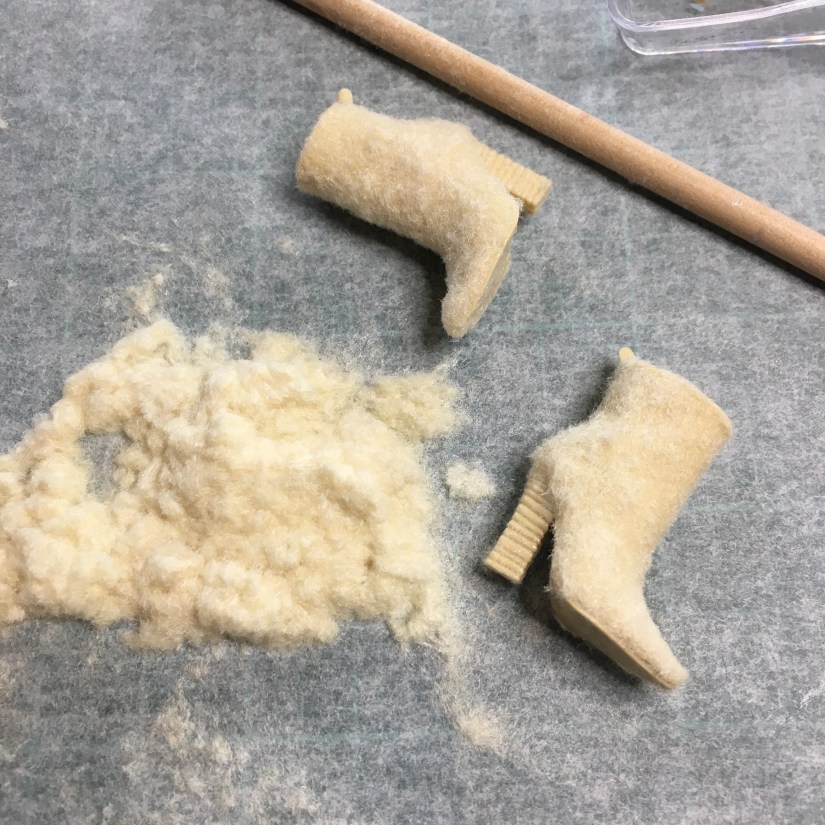
These are a good starting point to test out the process and I am sure we all have duplicates of these shoes. I tried to go in sections for most of the shoes I selected to cover in flocking. It makes it easier to control.
Dust off the shoes so you don’t have any dust or fuzz on them. You can also swab your shoes with alcohol first.
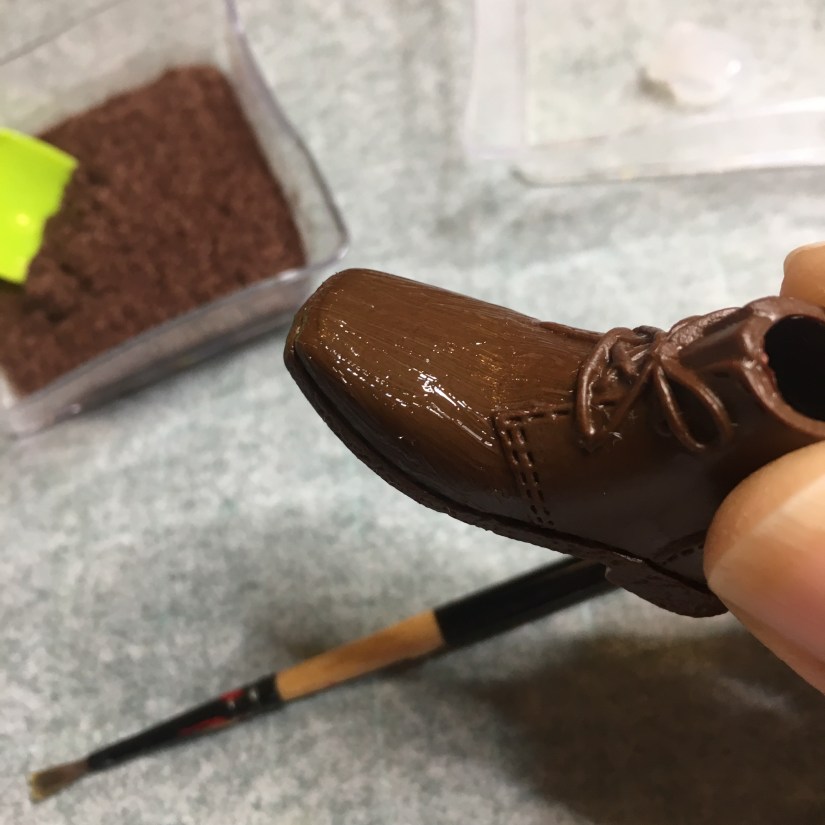
Pour some flocking into a little bowl for easy access and place a small dollip of the glue into another small bowl. The glue dries quickly so don’t pour in too much or it will go to waste.
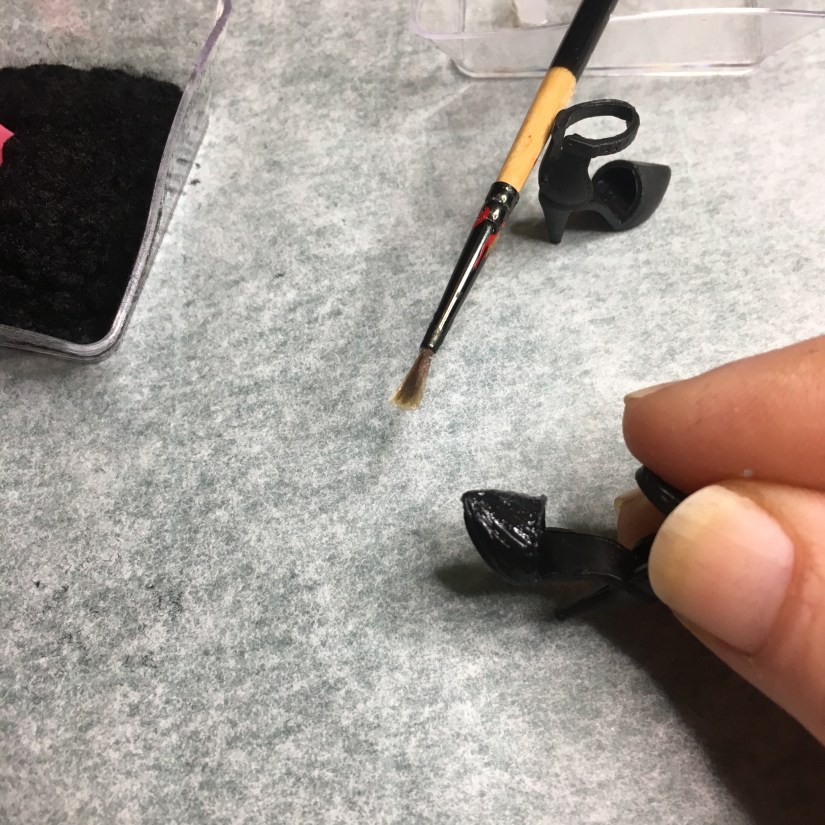
Brush the glue on the tips first. As mentioned above, it’s best to go in sections since the glue sets pretty quickly.
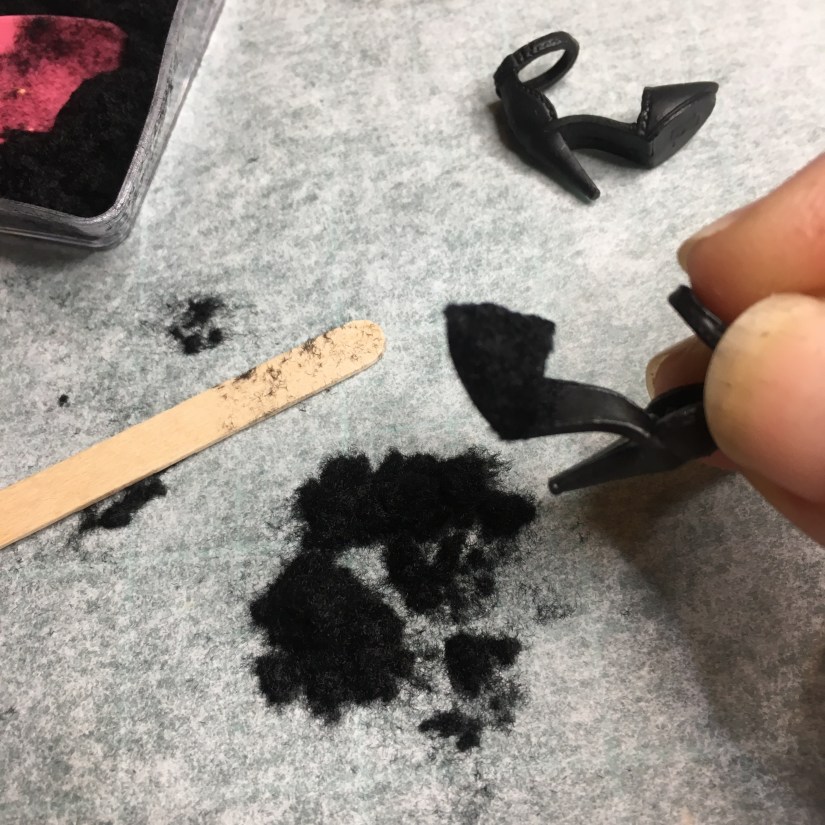
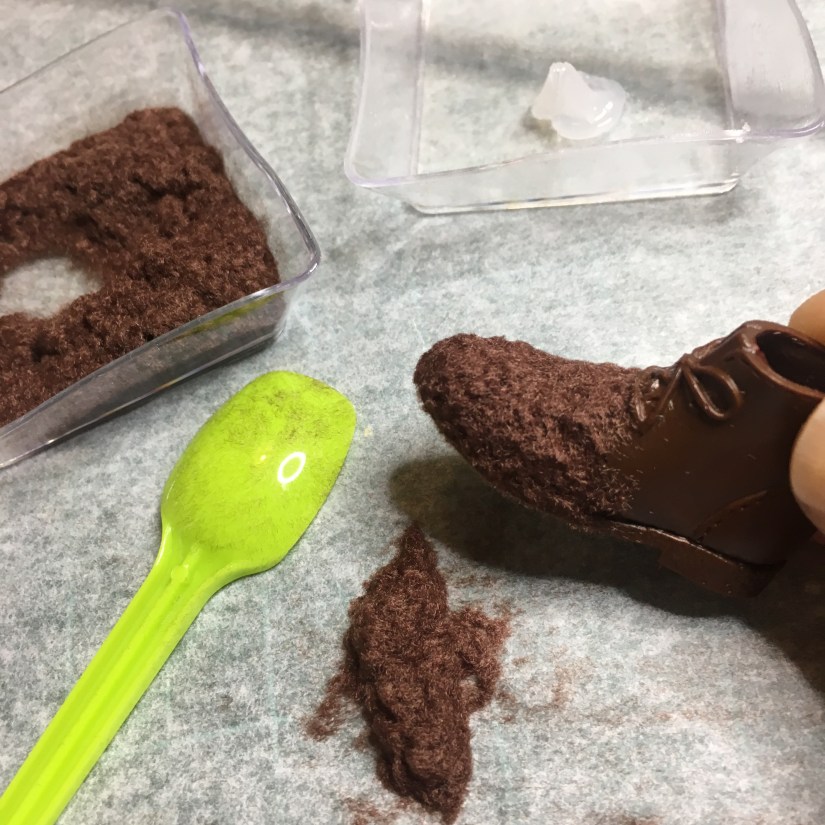
Scoop or pour the flocking over the wet glue. Pat down on the area lightly. Then tap off the excess. Once that area has dried for a few minutes, blow the excess off into a trash bin or bag.
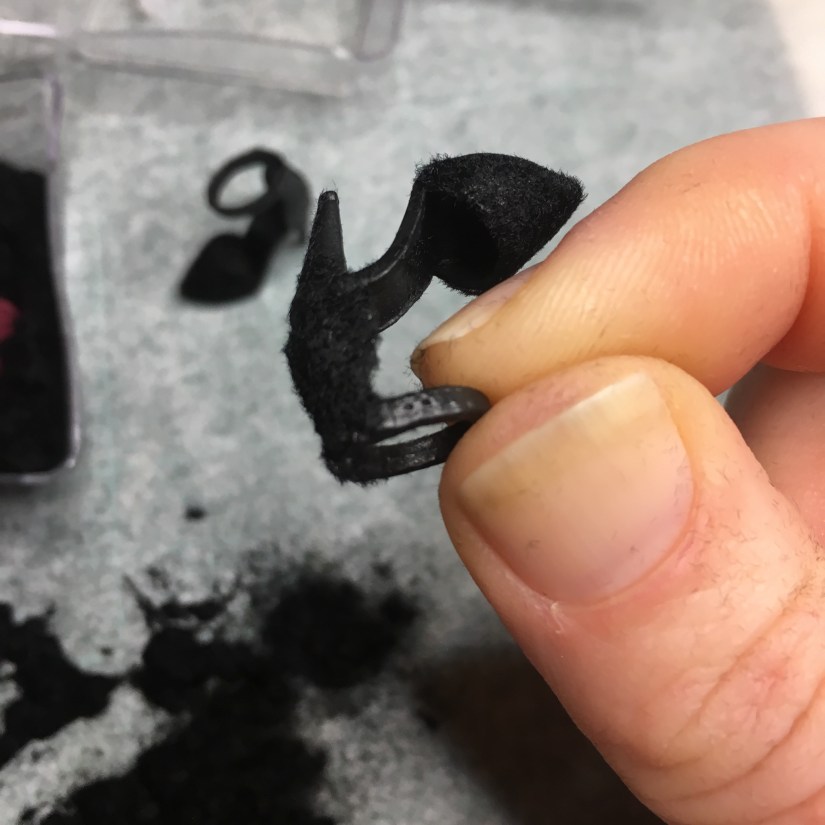
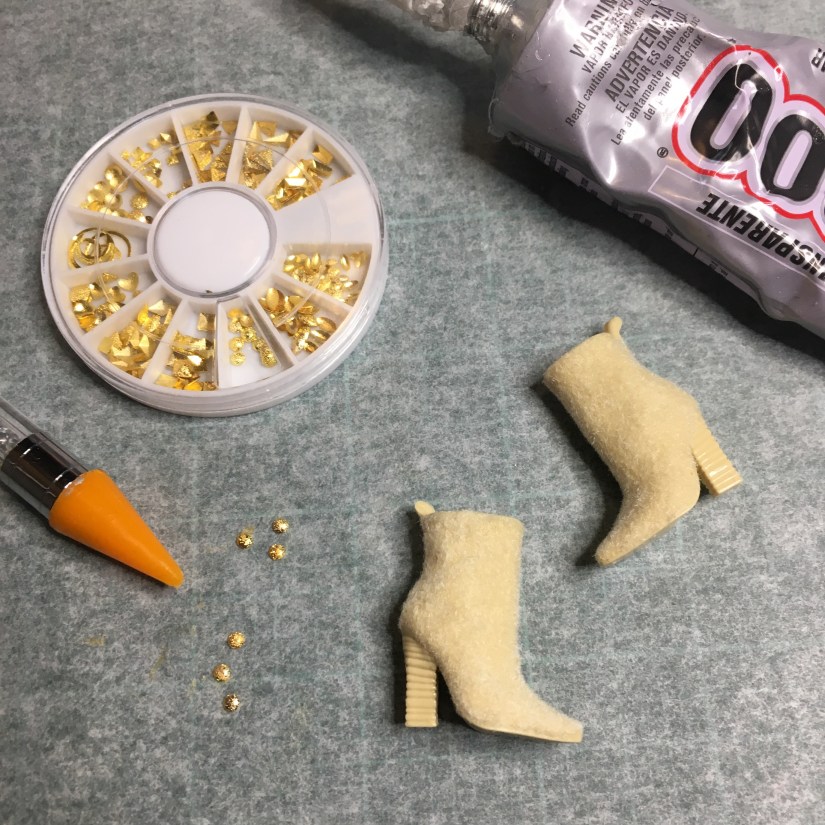
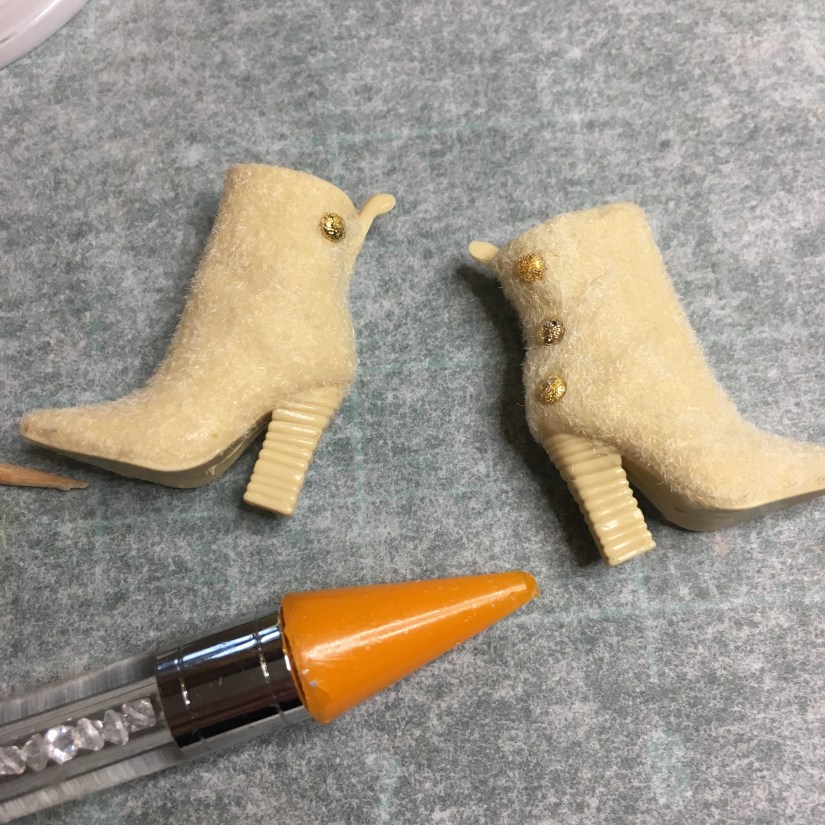
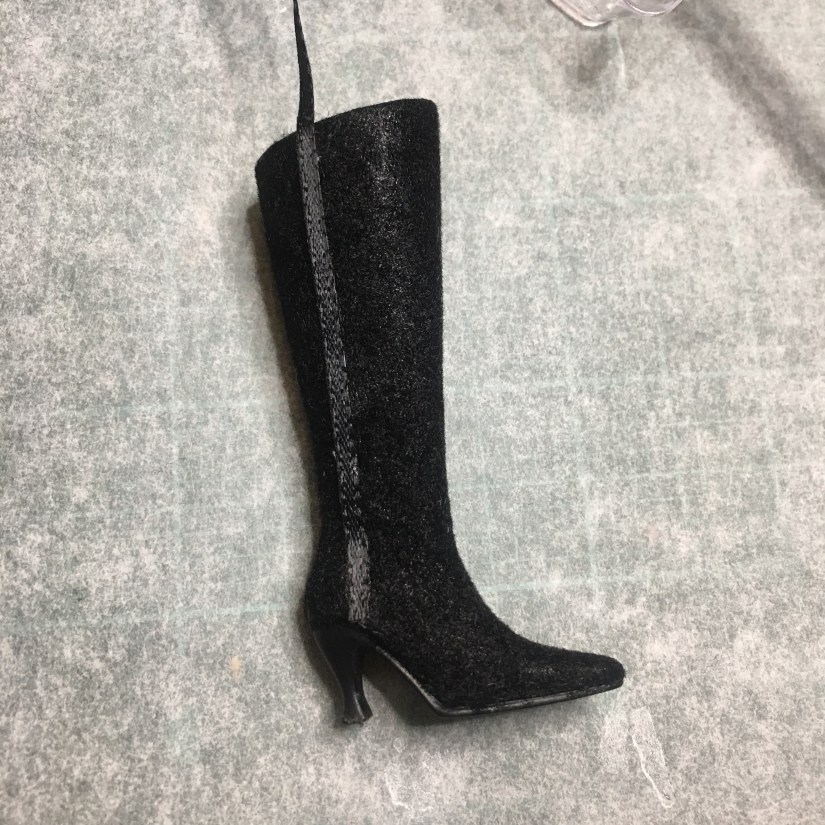
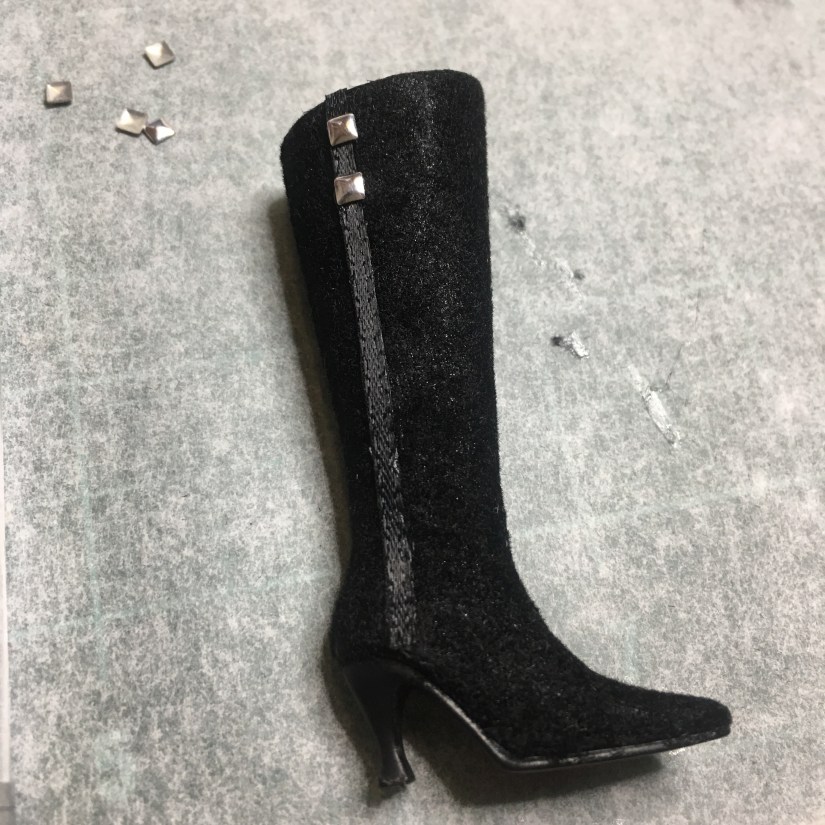
After brushing on the glue and sprinkling (or pouring) the black flocking onto the shoes, let them dry for a bit. I then added some nail art decor to look like buckles for a little flourish.
I purchased a few fantastic variety packs of metallic nail art at Amazon that I use often to embellish my accessories. Purchase the gold here and the silver and gold pack here.
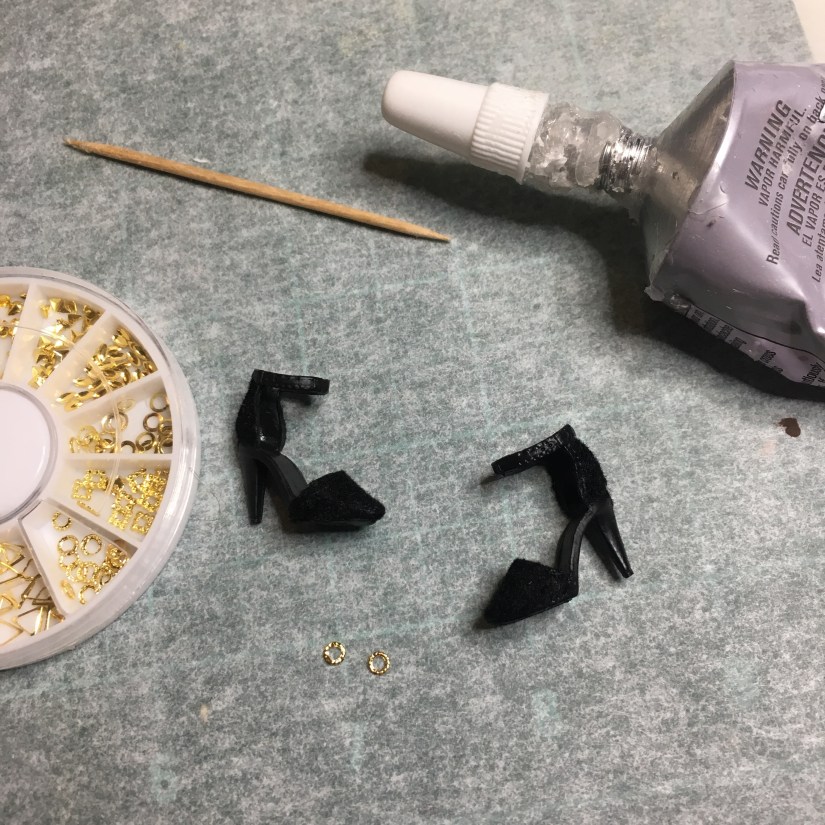
Use your trusty E6000 to adhere the metal accents. I like to use a toothpick to apply the glue. Let dry and set aside for use later.

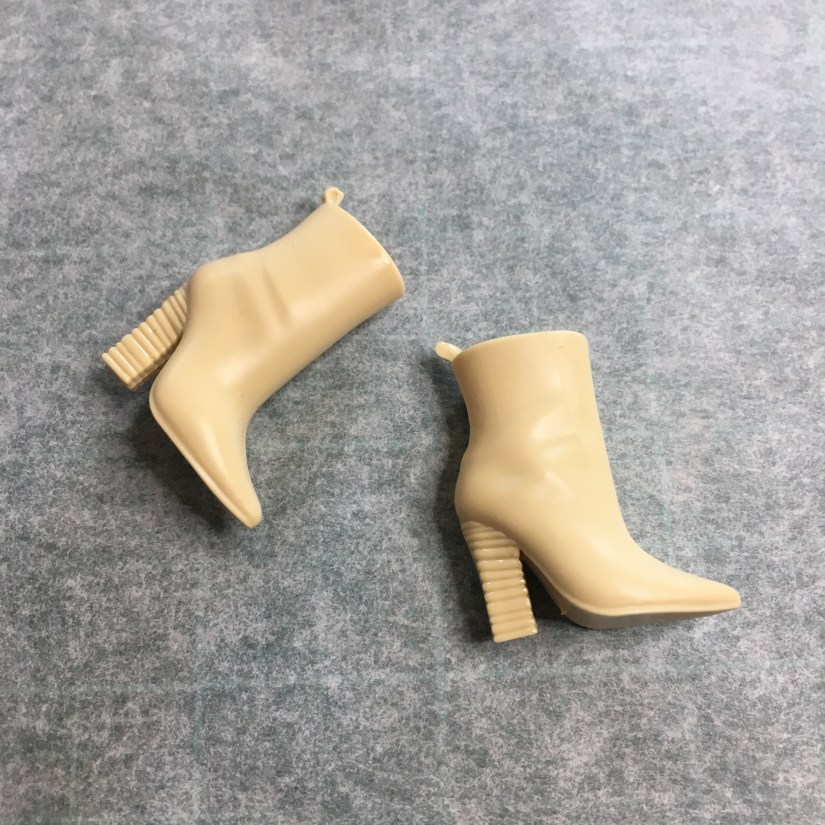
Neutral Nubuck Booties
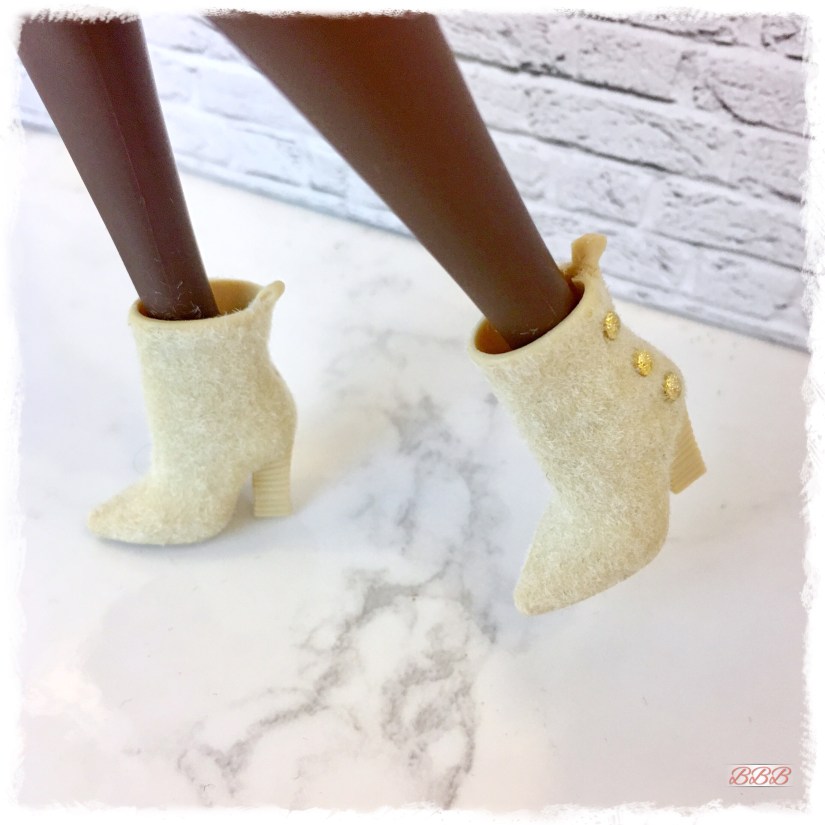
For this first style, I used a pair of pretty plain boots from the BFC collection. They are great boots, but they just sat in my box not calling me to pair them with anything. Now I think they are great!
Work in sections again starting from the base of the shoe and side to side. It does blend in well even when you do it in sections. You’ll get the hang of what works for you as you go.
Don’t forget to blow off the excess!
You can leave these as is, but I definitely thought they needed a little more detail.
E6000 again to the rescue!
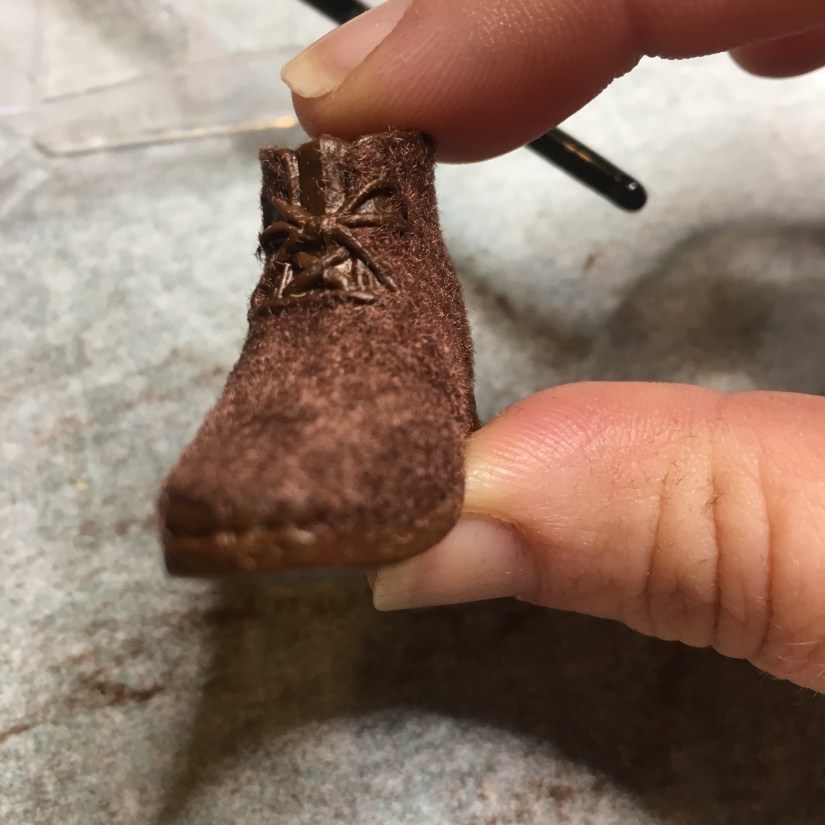
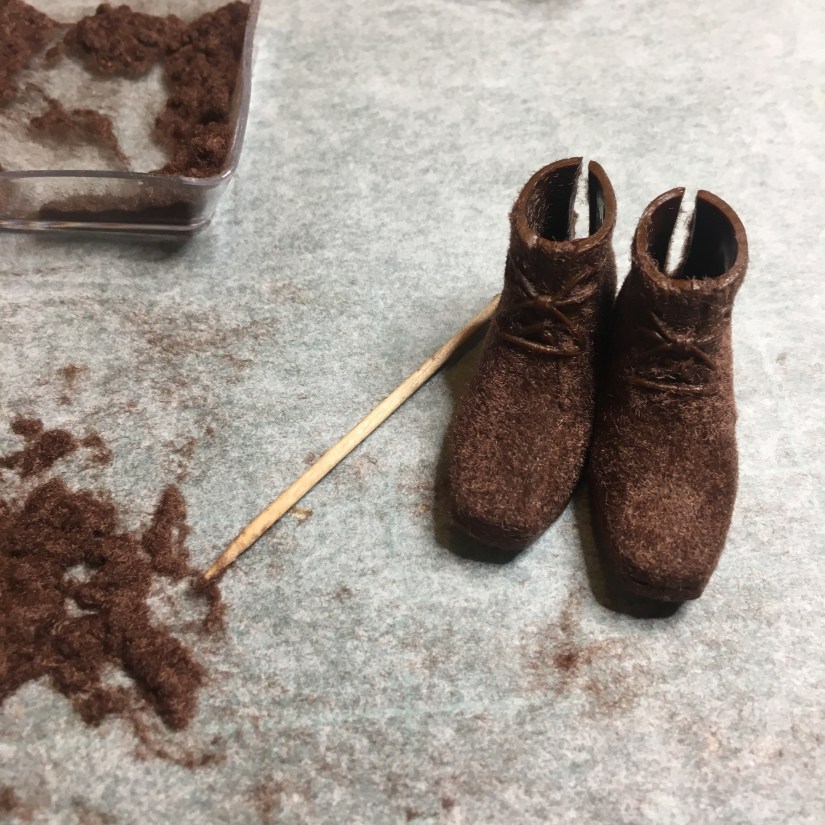
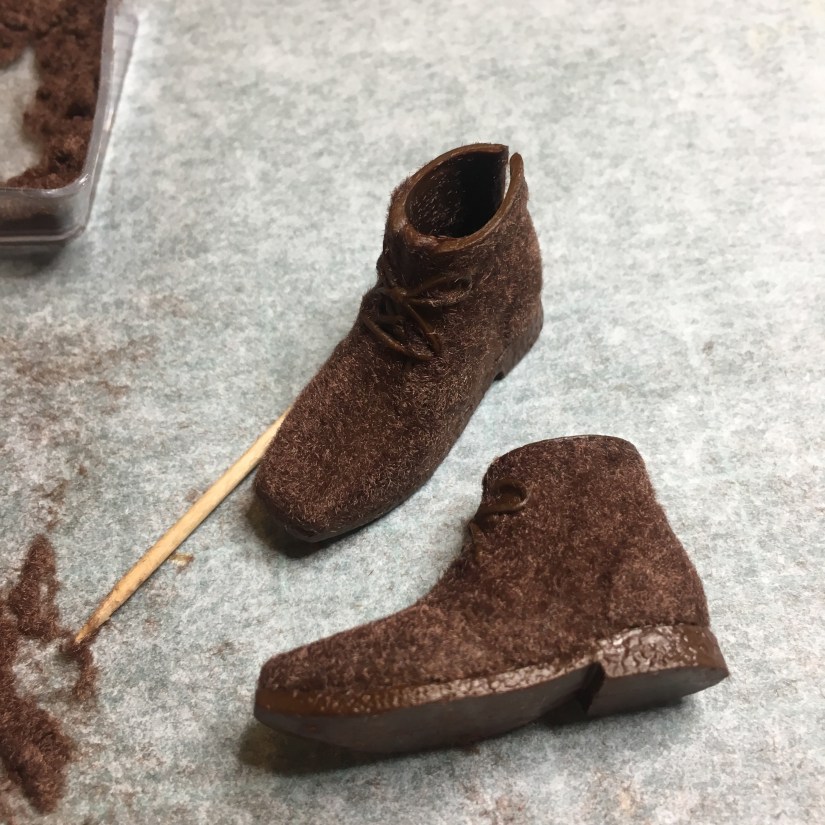
Suede Boots Made for Walking

I used some older boots I had that happen to fit the curvy girls so that is a real plus!

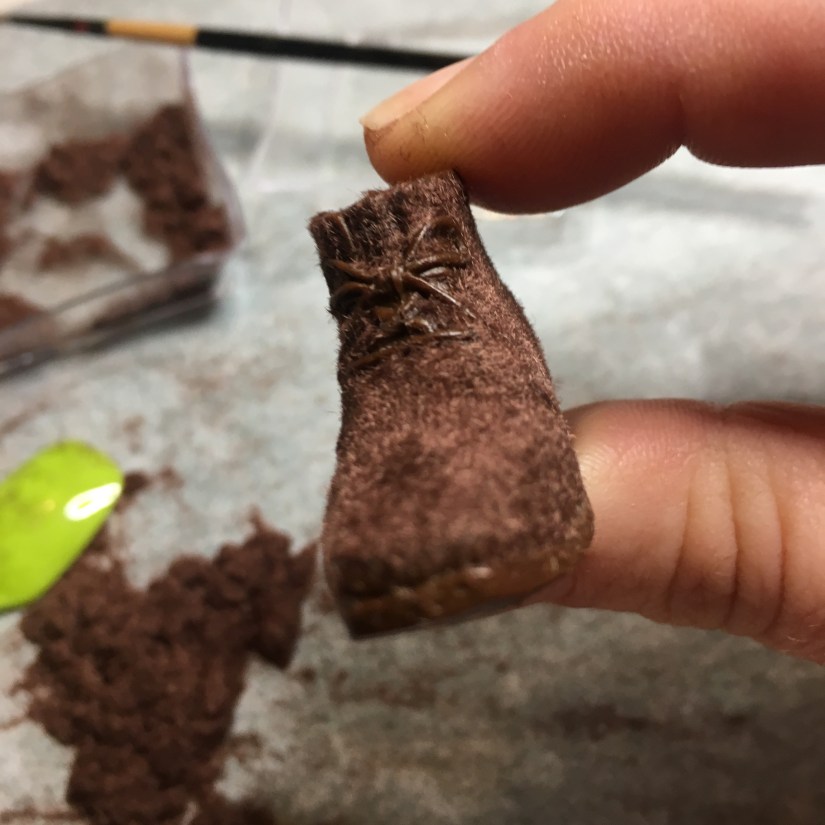
Follow the same steps as above. You’ll get the groove, but definitely work in sections unless you are adventurous.
I find it helpful to use a wooden dowel on some of the shoes to more easily manage the process.

After blowing off the excess you are left with a nice thin suede like coating.
I decided to add some embellishments to these boots as well. I added some ribbon and some more metallic nail pieces. This was a tad bit tricky as the glues weren’t really liking the flocking, but after a few tries I got the ribbon to stick using a combo of FabriTac and E6000. I don’t recommend blending them, but test it out on something else before deciding what you want to use.
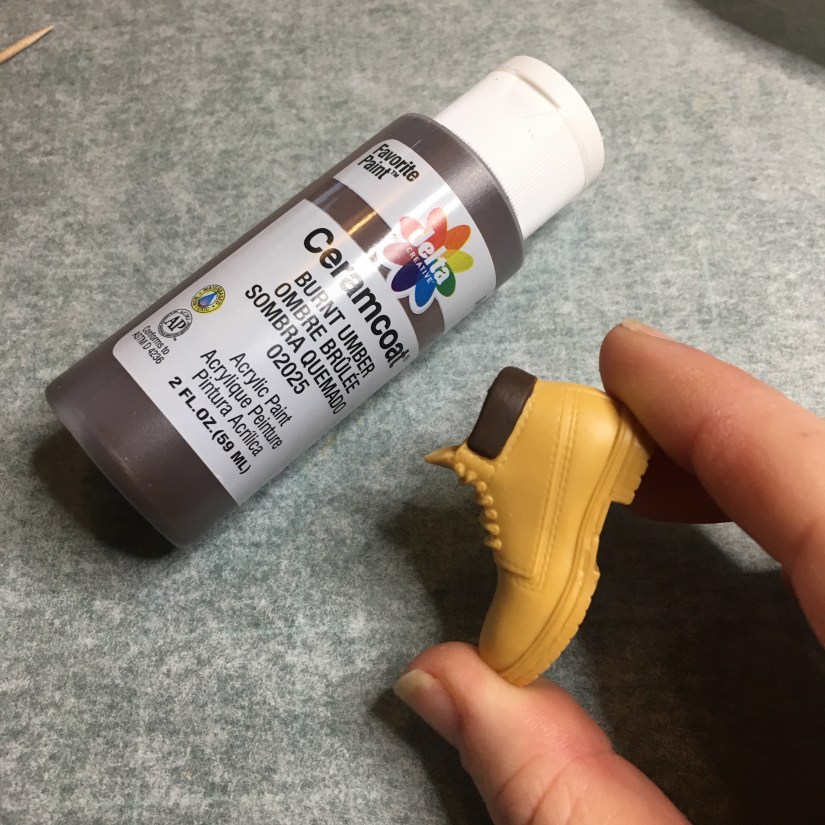
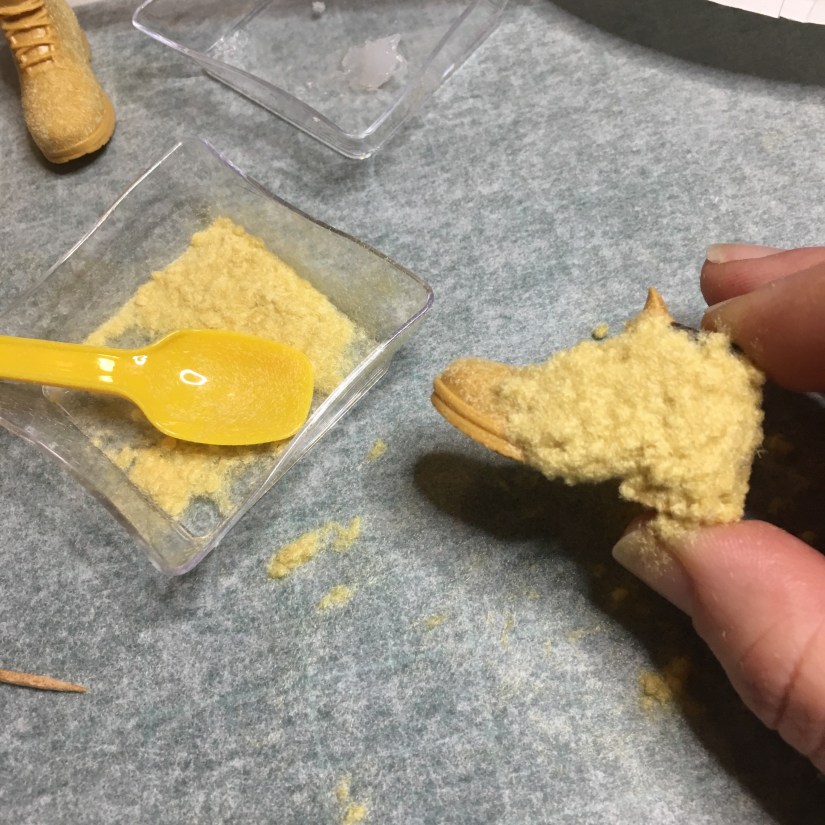
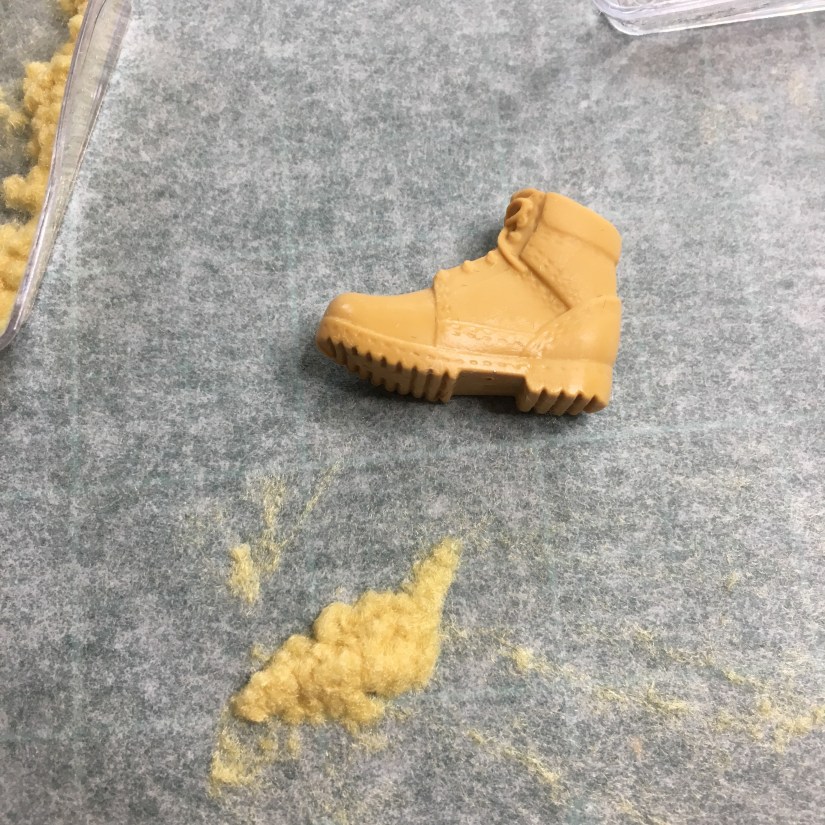
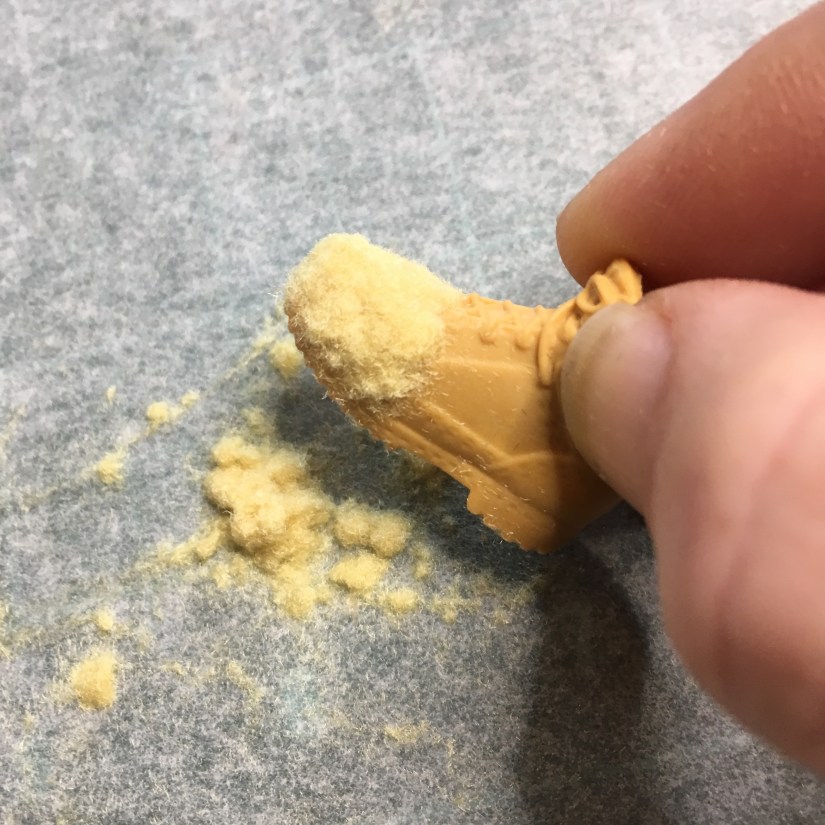
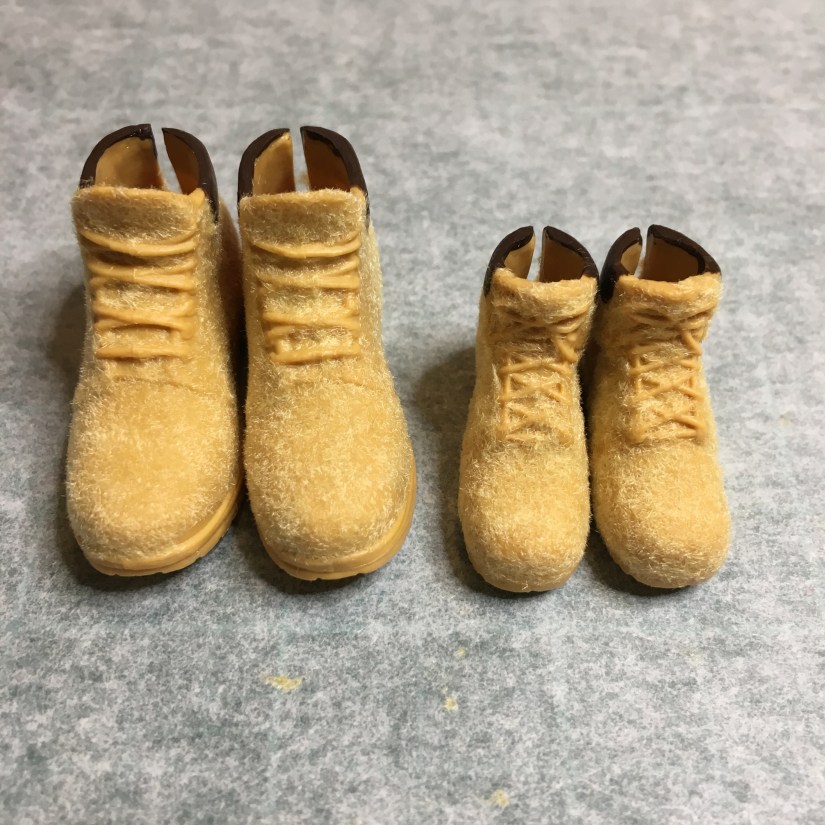
His & Hers Timberland’s
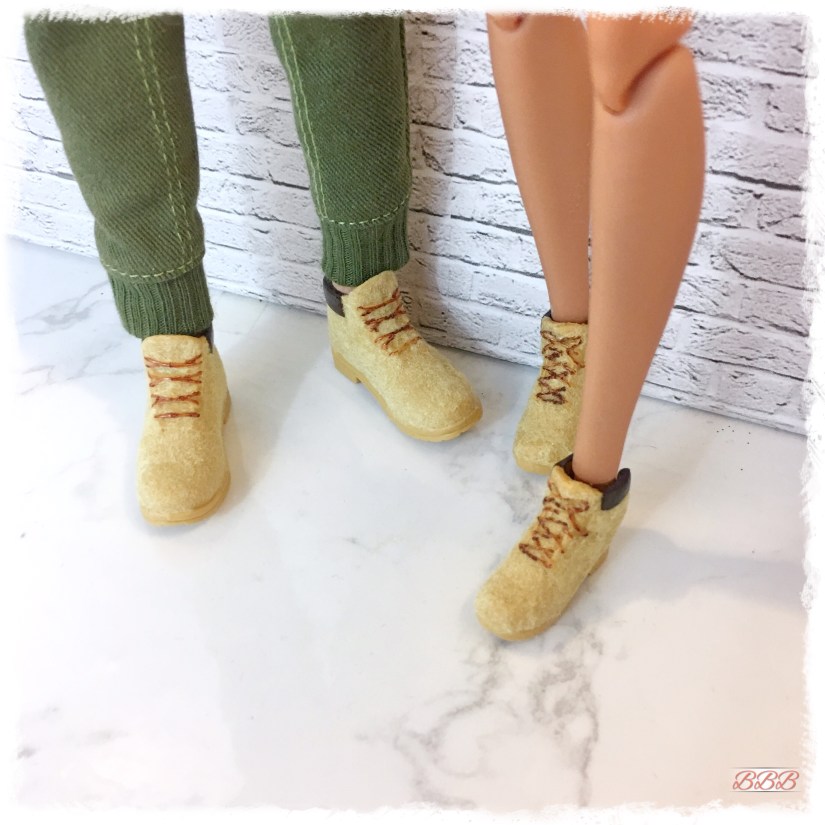
Of course we had to make these classic shoes.

Follow all the same steps as the others.
I did however add some craft paint to highlight the “leather” ankle band.
After the paint dries, dive into the flocking process going section by section.
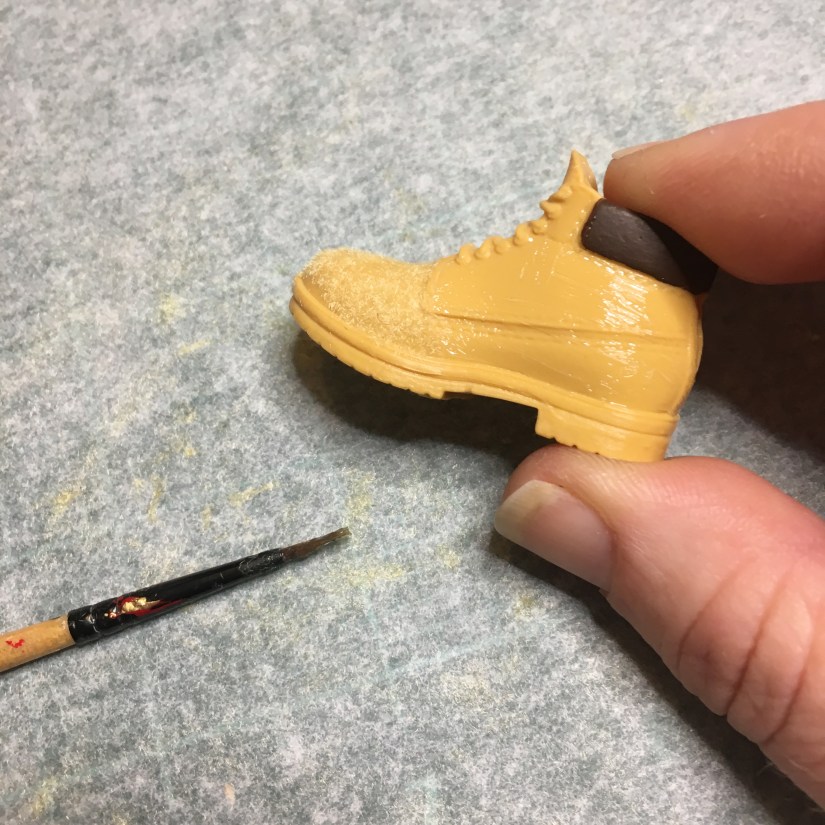
Tap off the excess flocking powder.
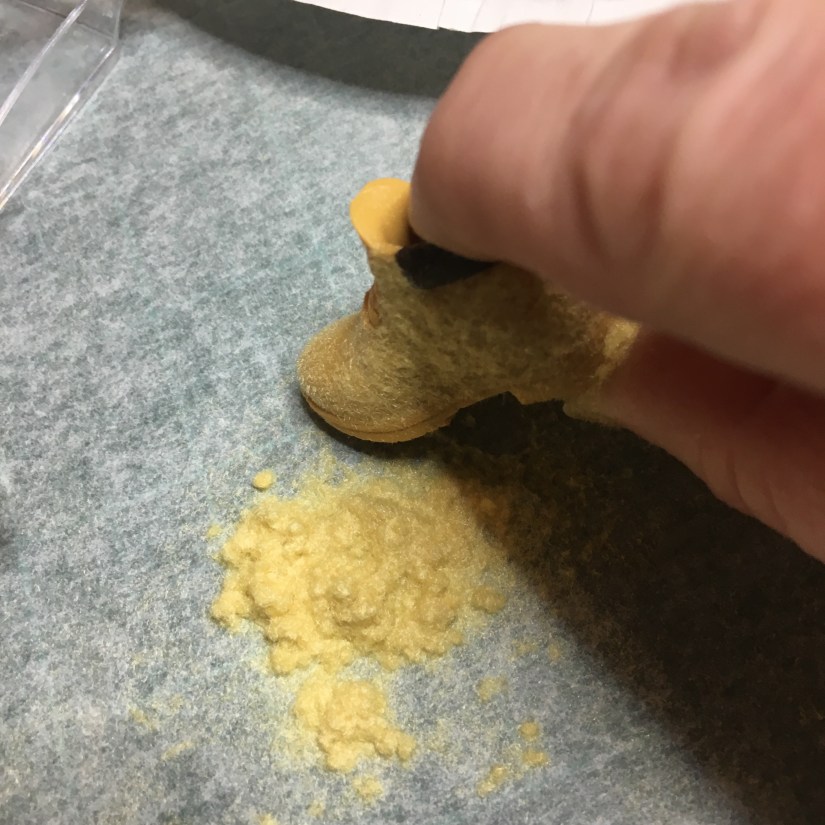
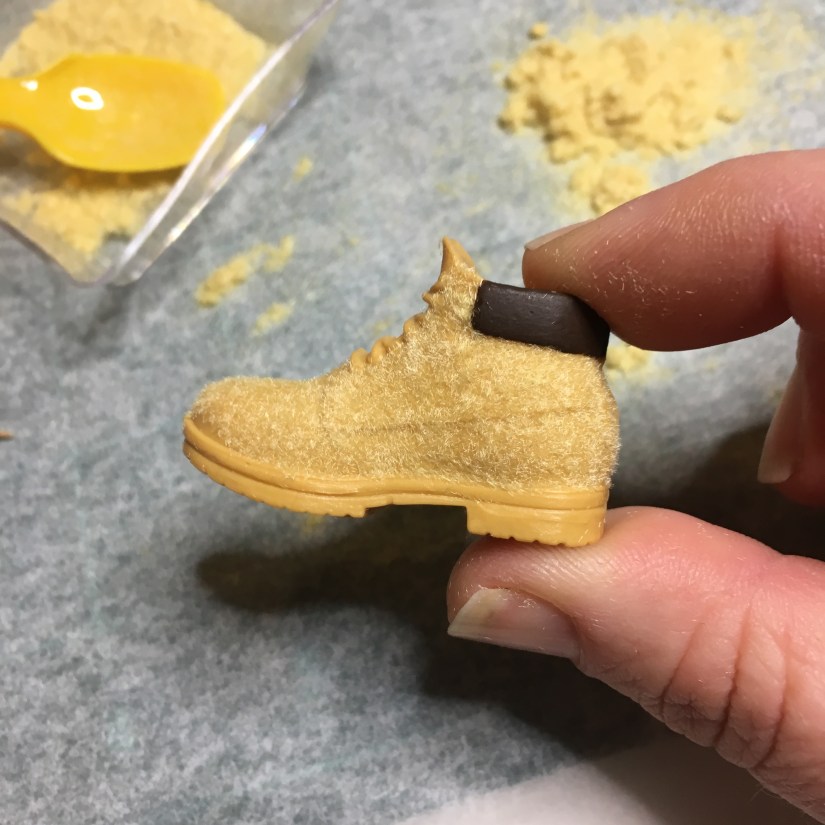
Barbie’s version is more segmented, so I just coated each panel separately.
So far, so cute!
For a little extra detail, I used a marker to add color to the laces.
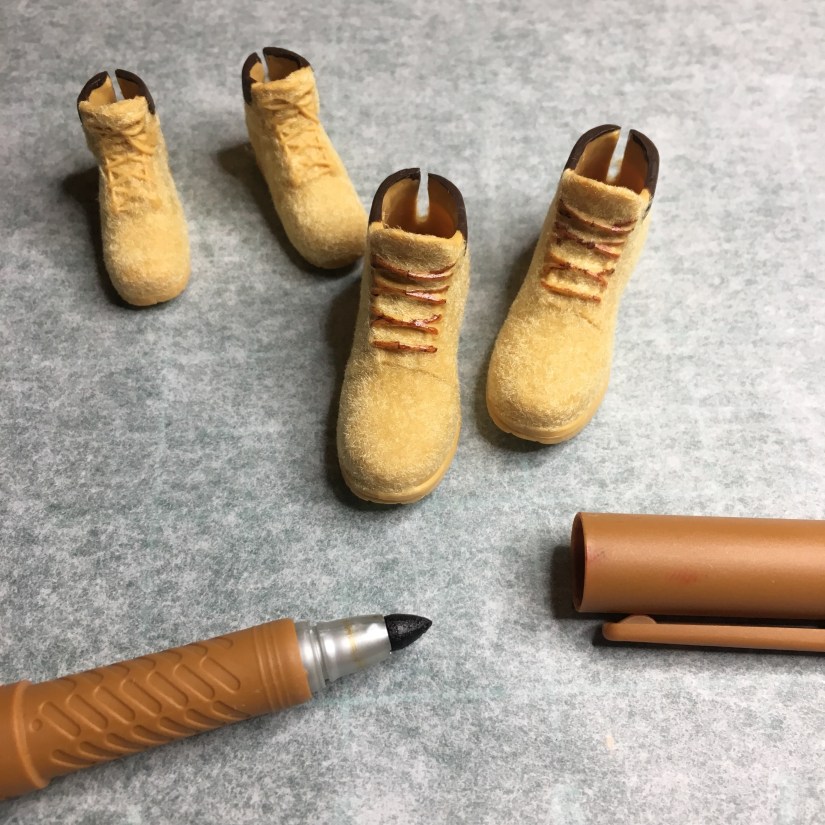
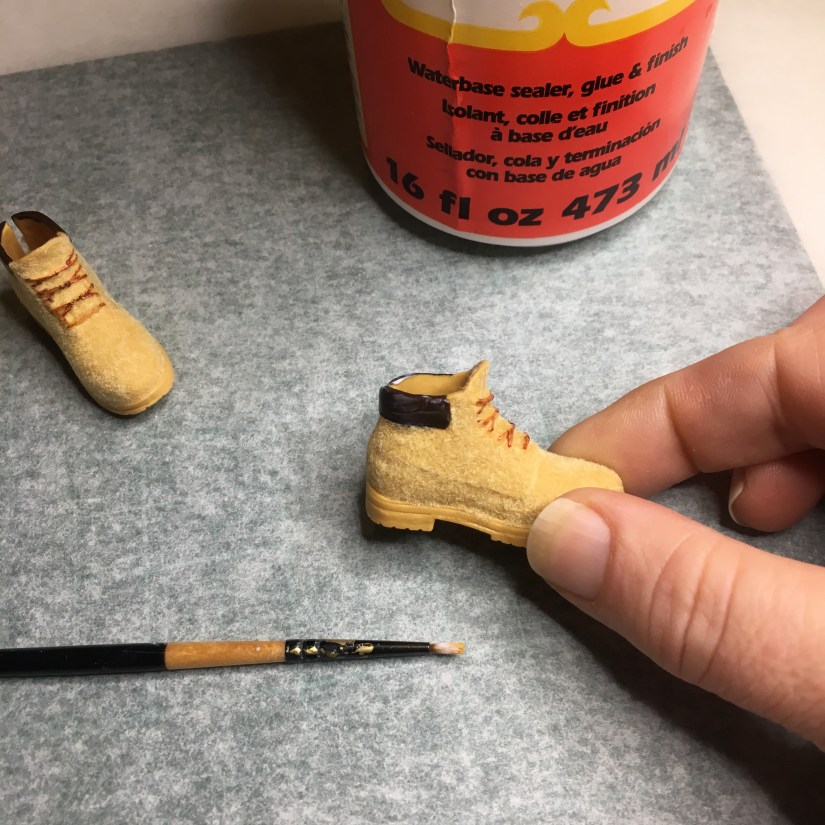
The finishing touch is to seal the “leather” ankle band with gloss Mod Podge.
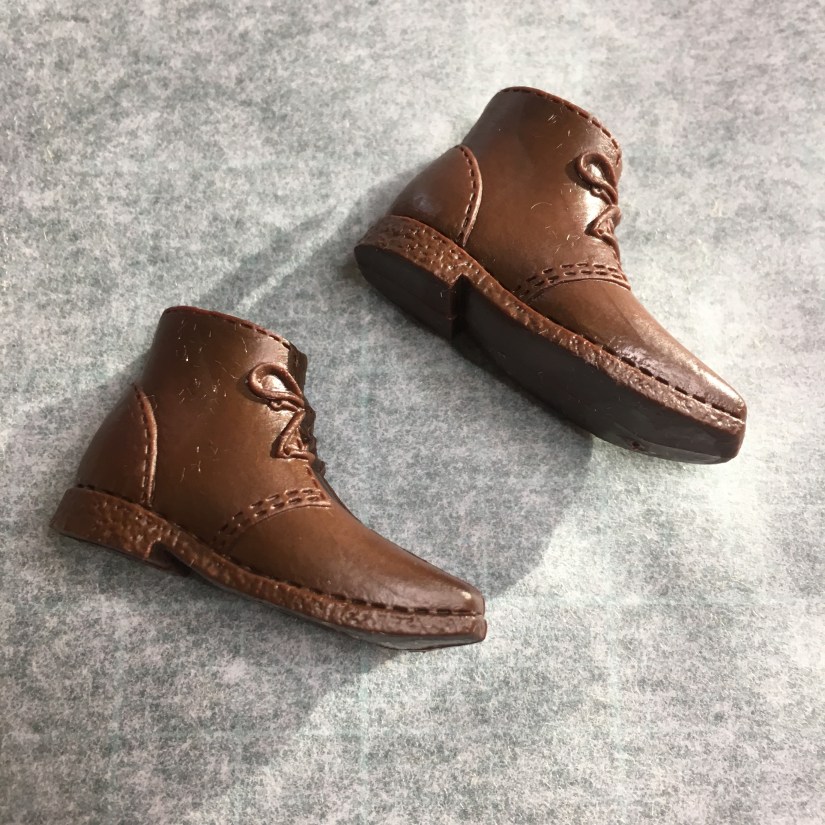
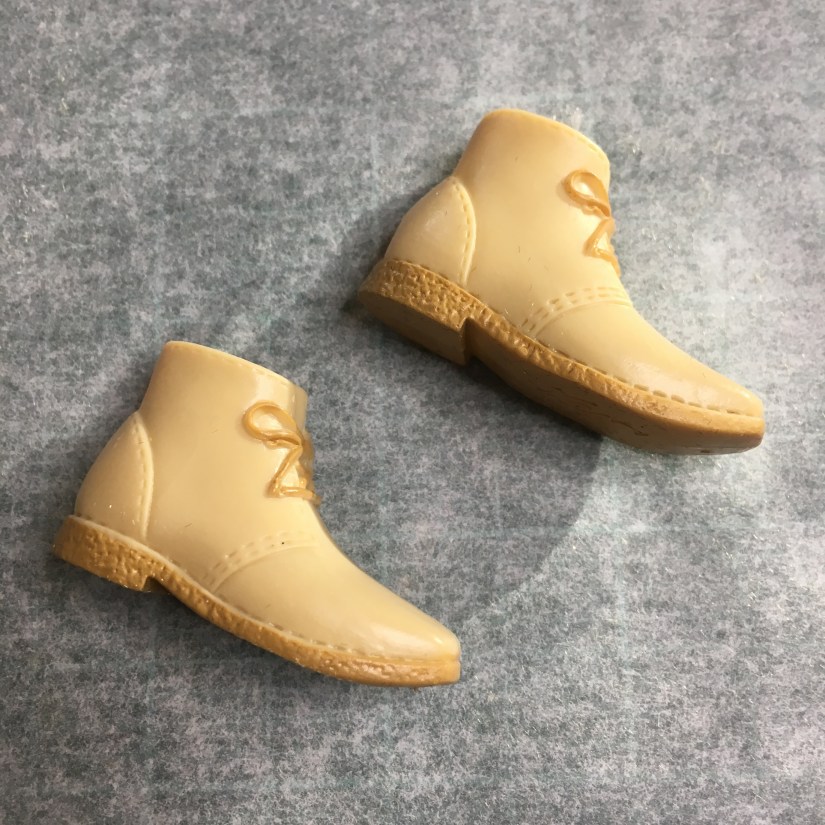
Suede for the Guys
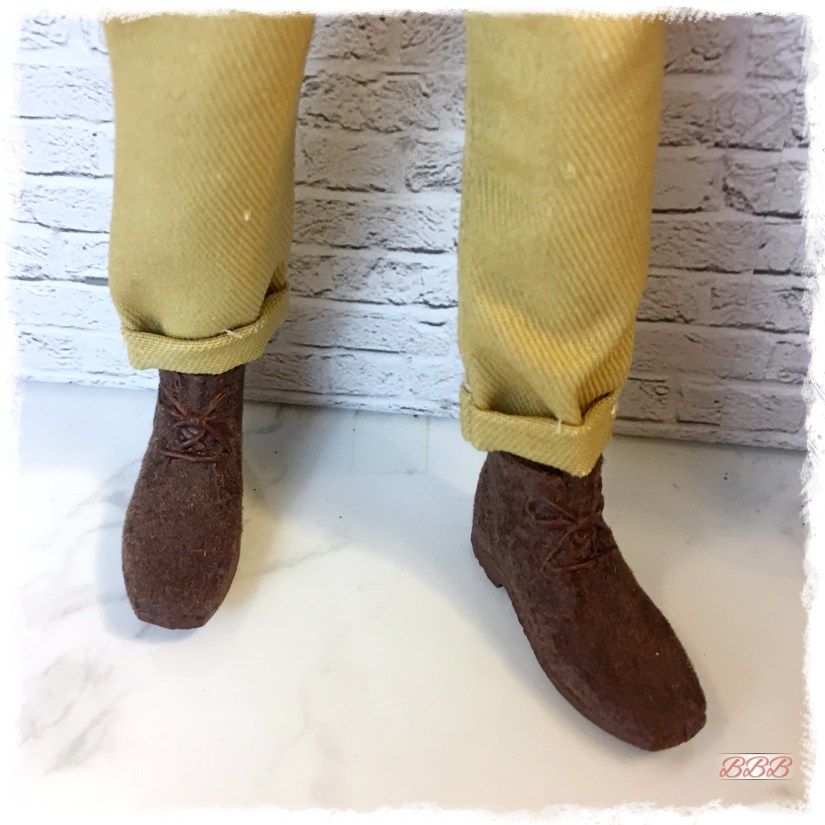
I thought these style shoes were just screaming for a suede effect.
Follow the same steps as all the others.

Once most of the shoes were covered, I tackled the tongue and lace area. Add just a light bit of glue and sprinkle over the power. Press into the crevices lightly.
Use a toothpick to wipe away any areas covering the laces.
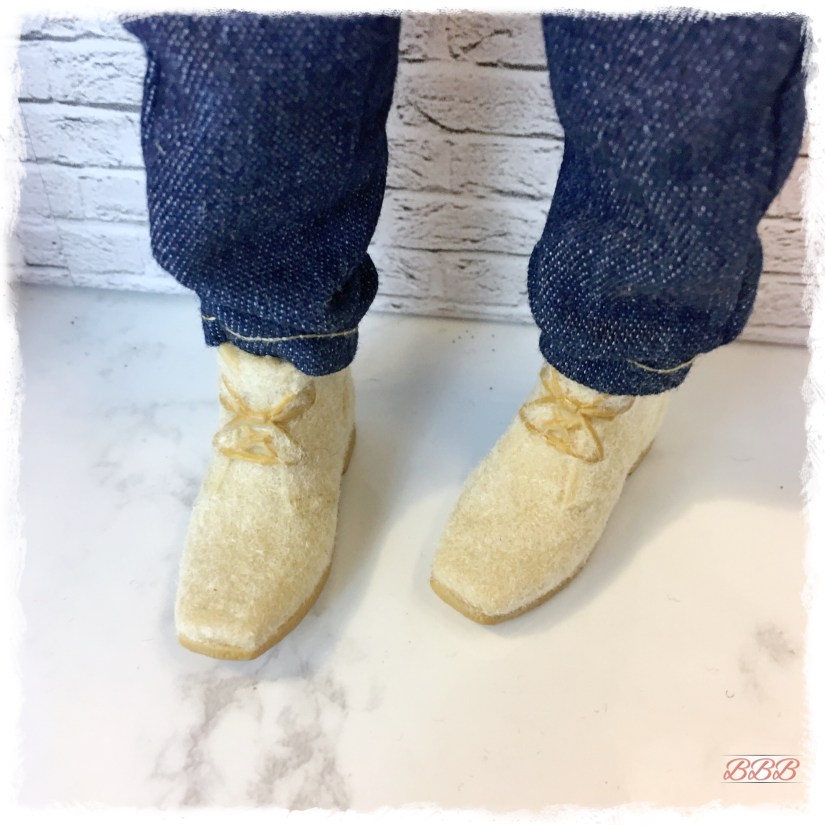

Use the same nude/flesh flocking used for the booties up top. Follow the same steps as above going section by section.
Other Ideas
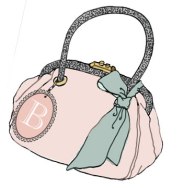
This method can also be used for handbags and purses or backpacks (or even some furniture). I just couldn’t find an item I wanted to use. Also, I focused here on matching flocking to the existing shoes, but you can certainly paint items a different color to achieve the look you want! You could even mix colors or add glitter to the flocking…
I’d also really like to do some in bright colors…imagine red velvet or blue suede shoes!
I hope this inspired you to try something new with flocking! I had a lot of fun and just love making our plastic accessories look even more realistic! I really hope to bring you something new each month whether it be a DIY or just what we are into at the moment when it comes to dolls and dioramas. Until next time…catch us on Instagram!
Rie & Bruni


Wow this ingenious girl!
LikeLiked by 1 person
Thank you! 😊
LikeLike
Very cool and creative idea – clear instructions, too. Thanks for the inspiration!
LikeLiked by 1 person
Thanks! Glad you enjoyed it and were able to follow along!
LikeLike
Thank you so much for posting this! I love that you said exactly what you used and where you got it. This was so helpful and and the whole thing was excellent.
LikeLiked by 1 person
Thank you!
LikeLike